Tired of usage-based pricing? Deploy your NextJS app on a VPS and host unlimited projects for a fixed $19/month.
Developing a great, performant web app has been made easier by the recent rise in popularity of full-stack frameworks like NextJS. After finishing your NextJS app, you need to start thinking about how you will put your work up on the Internet. While Vercel (the developers of NextJS) offers a first-party, one-click deployment solution for NextJS apps, it might not exactly be a fit for individuals who need more control over the server they're deploying on.
Hostari offers affordable, secure, and performant Virtual Private Servers (VPS) that can easily be configured to deploy your apps created on NextJS (and pretty much any web framework you work with). However, connecting to a Linux server and using a command-line interface (CLI) may be intimidating for those who don't have much experience with deploying to off-the-shelf web servers.
In this guide, we'll walk you through why, how, and when you should consider deploying your NextJS app on a VPS instead of Cloud PaaS providers like Amazon Web Services, Google Cloud Platform, and Vercel. Note that with this guide, you'll lose out on some features of NextJS (such as Image Optimization) because we'll be deploying it as a standard Node.js application.
Why should you self-host your NextJS app?
There are many reasons why you should consider self-hosting your NextJS app. Chief among them is the affordability and increased control you have over your deployment target. For budget-minded developers and savvy entrepreneurs, renting out a VPS from a provider like Hostari can serve your first 100 paying customers even on a $19/month 2vCPU, 4GB RAM VPS with 1TB of bandwidth. This kind of value proposition is hard to match with modern PaaS platforms that often charge based on usage or traffic. Aside from the surprising scalability offered by modern VPSes, there are other reasons why you would choose to set up and build on your own infrastructure:
- Predictable Monthly Costs
- That same $19/month VPS can run multiple apps and environments
- No more surprise bills from unexpected traffic spikes
- Fixed 1TB bandwidth means no per-request charging
- Only upgrade when you actually need more resources
- Real Developer Control
- SSH into your server whenever you need to check something
- Configure nginx and caching exactly how you want
- Run the exact versions of Node.js and npm that work for you
- Install Redis, PostgreSQL, or any other service you need
- Freedom to Build Your Way
- Use GitHub Actions, GitLab CI, Dokku or any CI/CD tool you prefer
- Set up custom caching that actually makes sense for your app
- Monitor your app with tools you already know and trust
- Run background jobs without paying for extra services
- Fine-tuned Resource Usage
- Host your dev, staging, and production apps on one VPS
- Configure memory and CPU exactly how your app needs it
- Run multiple projects without multiple hosting bills
Why should you NOT self-host your NextJS app?
As with any decision in software engineering, managed PaaS solutions have their place in the deployment ecosystem. For a framework like NextJS, some features are locked behind Vercel, such as Image Optimization. Despite the advancements in infrastructure tooling that have made self-hosting more accessible, there are still valid scenarios where you might want to stick with platforms like Vercel or AWS:
- Need for Platform-exclusive Features
- Vercel's instant preview deployments for every PR is a great collaboration tool
- Edge functions require additional configuration when self-hosting
- Built-in analytics and performance monitoring come ready to use
- Automatic image optimization needs separate setup on a VPS
- Time-to-Market Pressure
- Venture-funded startups might prefer spending resources on product development
- Platform features like automatic branch deployments speed up the review process
- Global CDN distribution comes out of the box
- Setting up your own CI/CD pipeline takes initial planning
- Team Dynamics
- Larger teams might benefit from standardized platform workflows
- New developers might already be familiar with PaaS deployments
- Infrastructure decisions require team-wide documentation
- Deployment procedures need to be communicated across the team
- Business Requirements
- Projects needing instant global presence might start faster with a PaaS
- Specific compliance certifications might require managed services
- Some enterprise clients might require specific platform deployments
- Rapidly scaling products might benefit from managed infrastructure
However, it's worth noting that modern tooling has made most of these challenges quite manageable. For NextJS specifically, projects like OpenNext are trying to de-couple the tight integration of NextJS and Vercel and making true NextJS self-hosting possible on platforms like Cloudflare and Netlify. If you don't mind losing some NextJS features by running it as a standard Node.js app, you can leverage tools like Docker and open-source PaaS alternatives like Coolify and Dokploy to make the experience of setting up a production-grade VPS much easier than doing things yourself.
Not many know this, but the choice often boils down to your specific needs, team size, and business context rather than technical limitations.
What do you need to host your NextJS app?
If you want to start dabbling in the world of self-hosted web apps and VPSes, you only need a few things to start:
- An active VPS with at least 2vCPU, 4GB RAM on Ubuntu 22.02 (shameless plug: we offer one for $18/mo at Hostari!)
- Any NextJS-based codebase (that preferably runs WITHOUT errors in dev mode!). For this guide, we'll be using the standard create-next-app starter template for simplicity.
- Optional, but highly recommended: a domain name so you can connect to your deployed web app with a domain name instead of an IP address.
How do you deploy your NextJS app for VPS deployment (and vice versa)?
The NextJS side of things
As mentioned previously, we will be using the standard create-next-app template so you can easily and quickly follow along. If you've already prepared your own codebase, feel free to just follow the general direction the guide takes. If your project uses a database like Supabase and tools like Drizzle, you will have to set those up first before you can proceed with deploying your NextJS. Please refer to your tools' respective documentation on how to host them on your VPS (if they offer this option!).
Now, let's proceed with the guide.
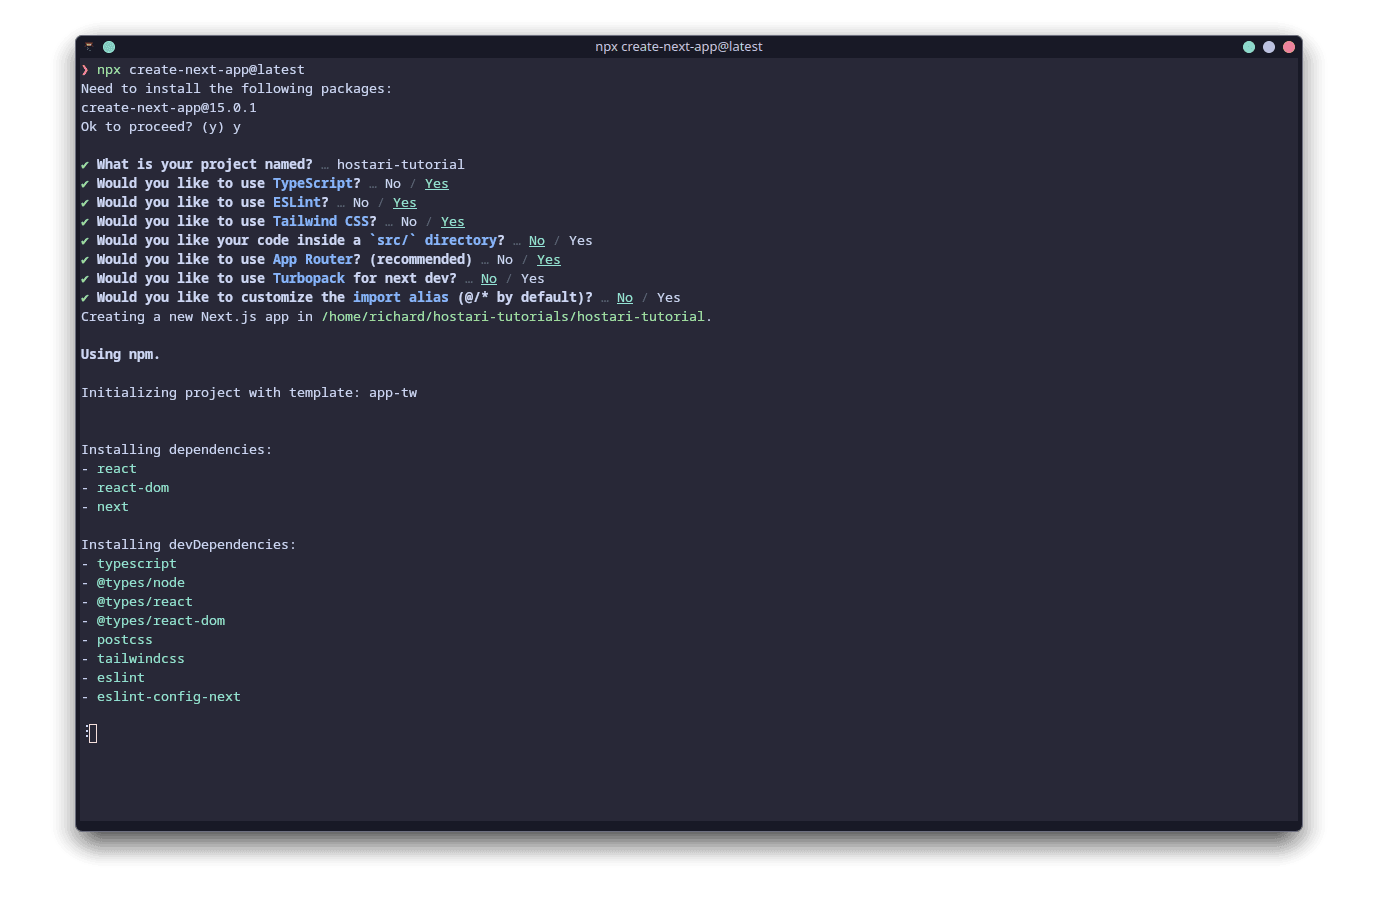
Step 1 - Run create-next-app
Since we don't have any NextJS codebases available yet, let's run create-next-app and set up a basic NextJS project.
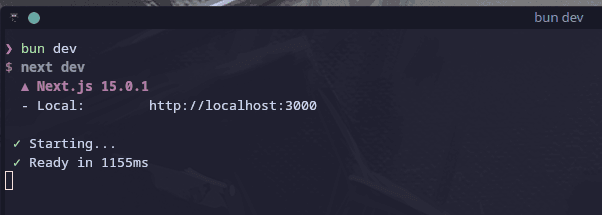
Step 2 - Run the development server
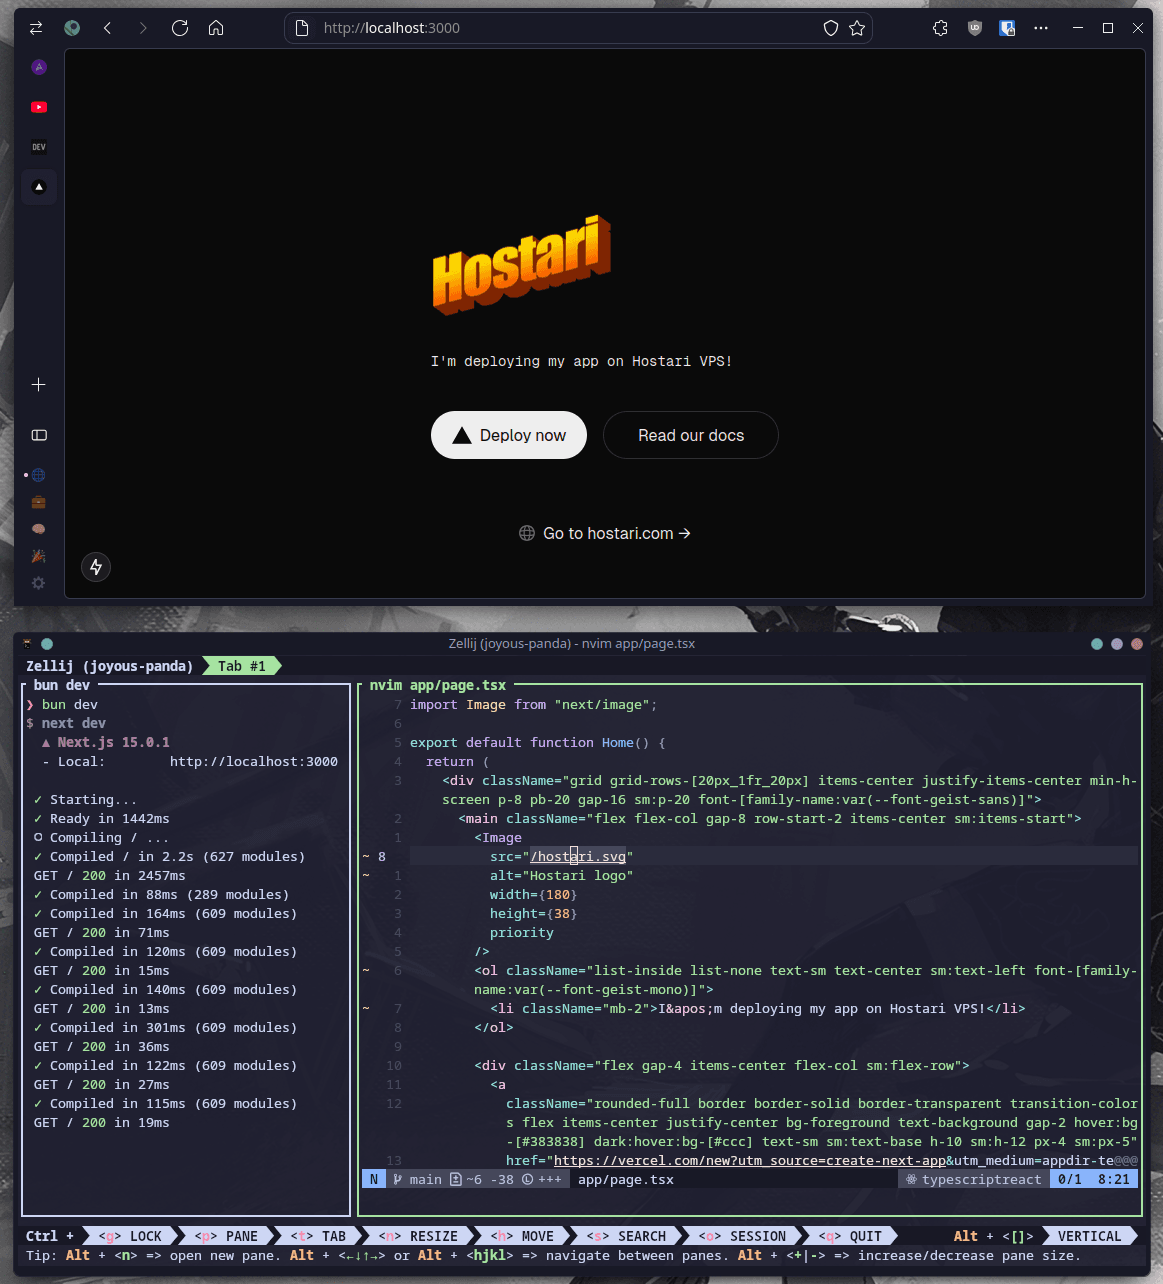
It's always good to do a sanity check when you start a new project. Run the development server by running npm run dev or whatever Javascript runtime you're using. I personally use Bun, so you'll see me running bun dev in the screenshot.
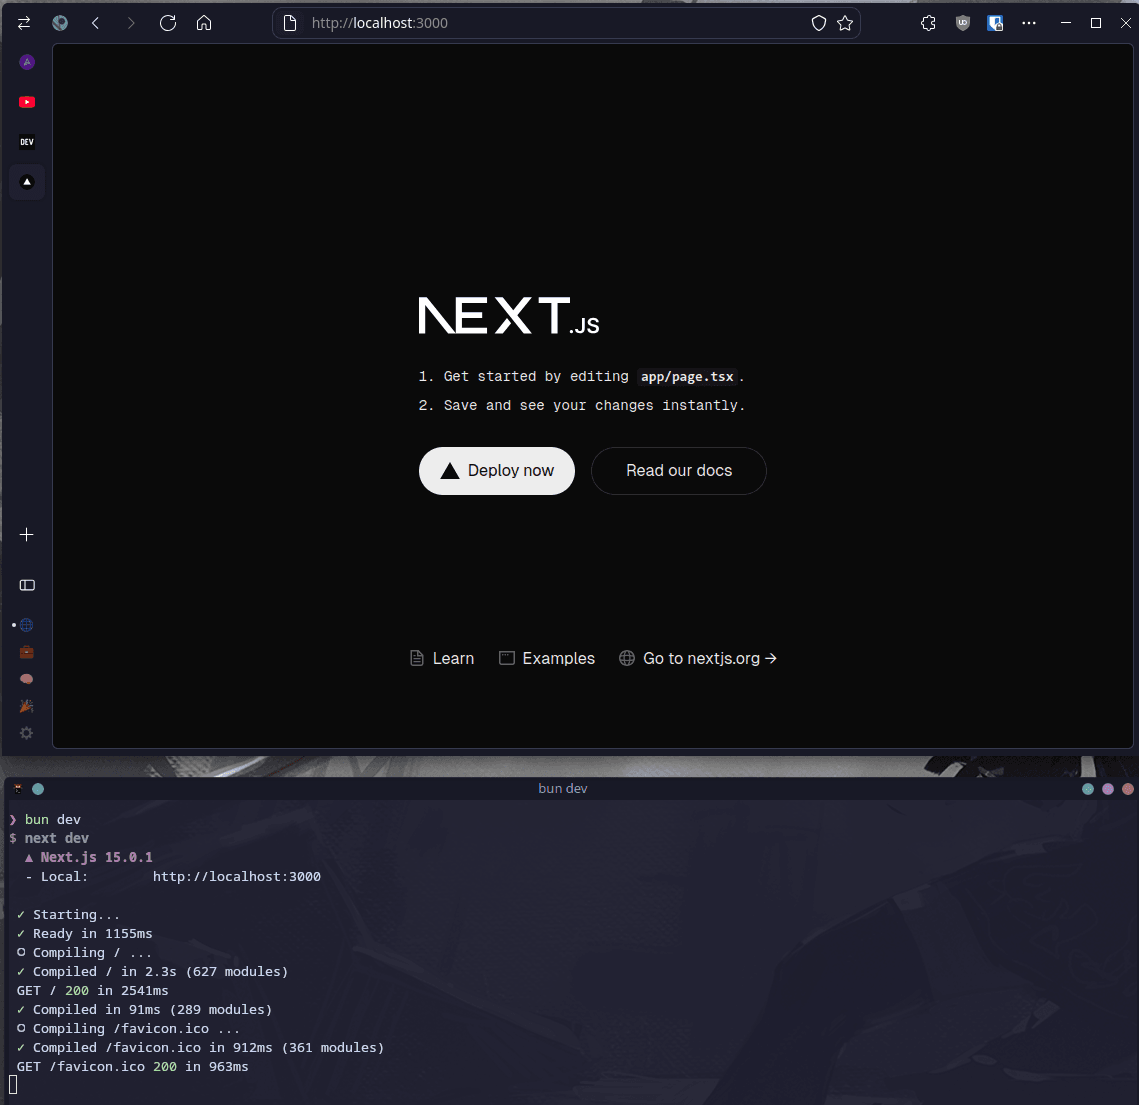
Once you've turned on the development server, you can go to localhost:3000 in your browser of choice. If all went well, you should be able to see the standard create-next-app: a NextJS logo, some text, some buttons, and some links.
Step 3 - Make some quick changes to the create-next-app template
This step can be considered optional, but I encourage you to make some light changes in your app/page.tsx file. If it's your first time deploying your website to a VPS, it's a great feeling to see that your work was successfully published on the Internet.
Step 4 - Take note of any environment variables and API keys that you might need
When you deploy to a VPS, you typically also need to set up your environment variables (such as URLs for your database) and API keys again. For example, if you built an AI app that relies on the Anthropic or OpenAI APIs, you will need to either create a new API key solely for the VPS or you could also re-use your existing development API key. I recommend creating new API keys for your deployment environment for easier management and distinction between your local, development environment and your production environment. I'd also like to mention that, if you're using a platform like Github for your version management, you should absolutely not commit your environment variables and API key alongside the other files of your project. Always make sure that your .env file is included in your .gitignore file!
For this guide, we don't need to set up any environment variables because we just used the default create-next-app which is pretty barebones (perfect for learning how to do a simple VPS deployment).
Step 5 - Prepare your VPS for deployment!
From this point forward, we will mainly be working on the VPS side of things. As you might've noticed, the core process of setting up your NextJS app for VPS deployment is rather straightforward and mainly involves sanity checks. Do note that you might need to do some other steps depending on the stack you're using (such as additional database setups). For those instances, please always check your tools' documentation if they have a guide explaining how to host them and prepare them for a production environment.
The VPS side of things
Now that we're sure that our NextJS app runs perfectly on our local environment, its time to do the fun part -- deploying and running your NextJS app on your VPS!
There are many ways that you could go about deploying your NextJS app on a VPS, such as using Dokku which allows you to deploy to your VPS using Git. I believe that it's really important to learn the basics of something before you use tools that make your life easier. This is why we'll keep things simple and straightforward, using the most basic (but still production-ready) approach to deployment. The approach I will show you just relies on a basic nginx configuration.
Before we start, make sure that you have the following to have a smooth deployment experience:
- At least a 2vCPU, 4GB VPS from a trusted provider like Hostari or DigitalOcean
- SSH credentials for your VPS
- SSH keys for your local machine
- Your public (NOT private) SSH key should be uploaded to your VPS
We won't go through the process of creating SSH keys for your local machine as many other guides already go through that. If you're using Hostari, you should have already had the chance to upload your SSH key to your VPS. Your VPS provider should also have given you SSH credentials for your VPS, which are a useful fallback option to connecting to your server when you haven't uploaded your public SSH key yet.
Step 1 - Connect to your VPS via SSH
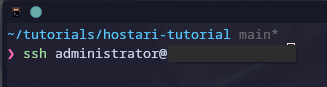
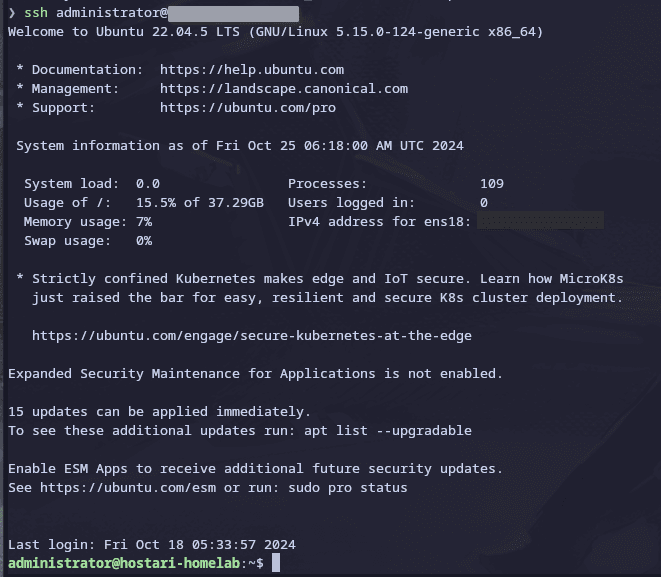
Use your favorite Terminal app to connect to your VPS through SSH. If your public SSH keys have been uploaded to your VPS, you should be prompted for the passphrase of your SSH key. Otherwise, you can use your SSH username and password credentials to connect to your VPS.
ssh <username>@<server_ip_address>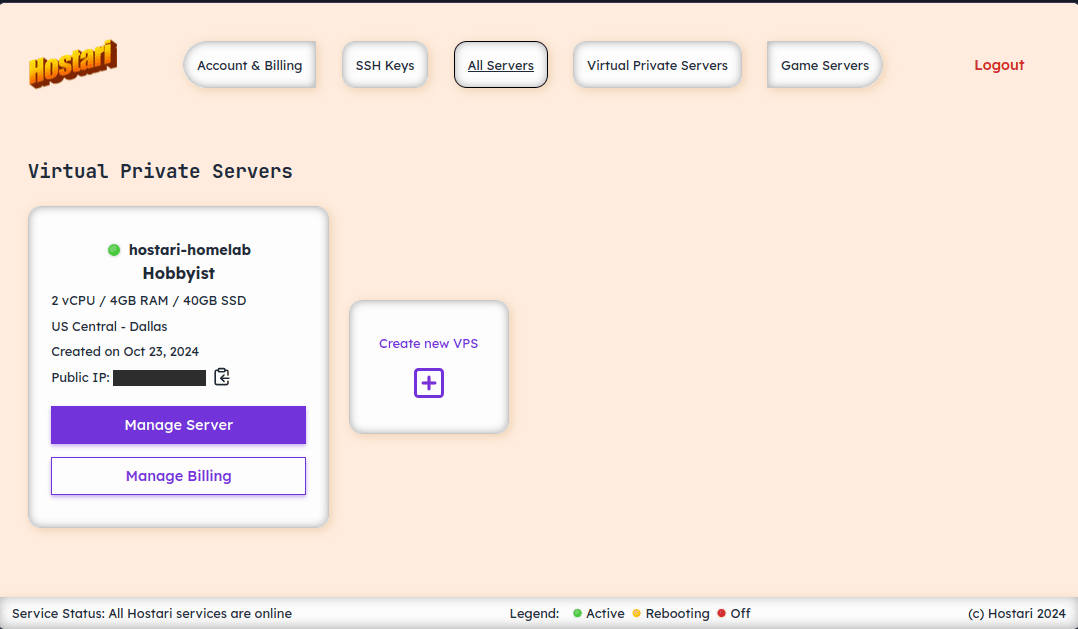
Step 2 - Install the necessary software on your server
For our case of hosting NextJS apps, we will need to install your preferred Javascript runtime on your server. If you're just starting out, I recommend installing Node.js. Make sure that the version of Node.js that you're using is the same version you're using to develop your app so you will encounter less issues in the process. If you want to install Node.js instead of Bun, you can run:
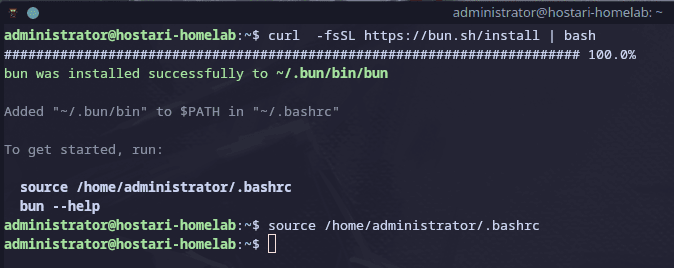
sudo apt install nodejsAs I mentioned earlier that I use Bun as my Javascript runtime of choice, I just have to run the following command and I'll be good to go:
curl -fsSL https://bun.sh/install | bashSince we're in a server environment and preparing it for production, always consult the documentation of your tools on their recommended production practices so you keep your server secure and in a working state.
Step 3 - Clone your repo from Github (or similar) into your VPS
We're a few steps away from seeing our NextJS app hosted in our VPS. After installing your preferred JS runtime, you need to clone the Git repository of your codebase. If you don't use version control, you can use other methods like FTP to upload your codebase manually to your VPS.
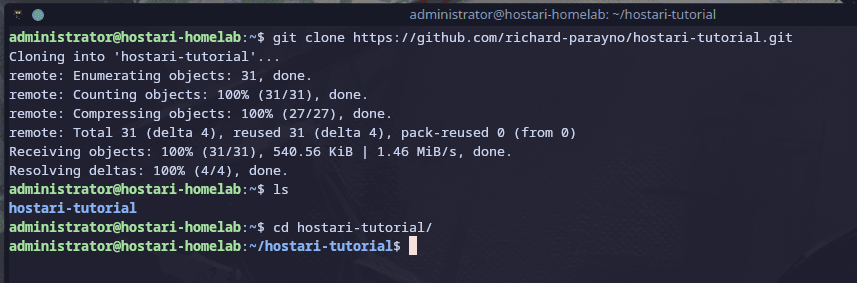
My sample project is up on Github, so I cloned my repo from there.
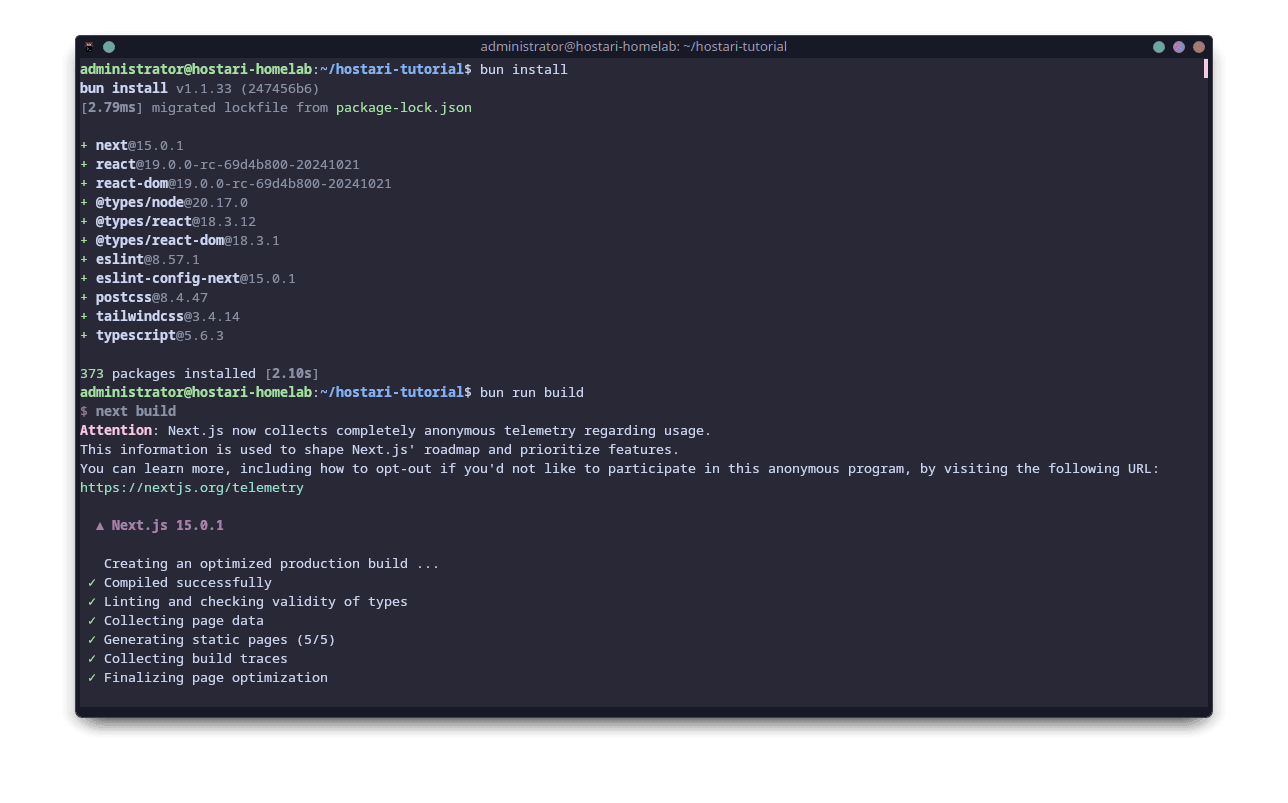
Once you've put your codebase on your VPS, you will need to install your codebase's dependencies, set up environment variables, and build the production version of your app before you can run it. Since we don't have any environment variables, we only need to run bun install and bun run build.
Step 4 - Start your NextJS app and access it using IP Address
Now that you've prepared your server, JS runtime, and codebase on your VPS, it's time to run it and "put it on the Internet"!. You will need to run the following command: bun run start.
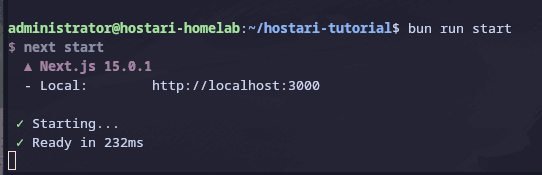
Once you've built the project for production, you can go ahead and start the production server.
One thing to note: running bun run start this way means your app will stop if you close your terminal session.
For a production environment, you might want to use a process manager to keep your app running. Tools like PM2 are great for this, but we'll keep things simple for now and tackle that in a future guide.
Congrats, your NextJS app is now technically deployed on your server's port 3000 with HTTP. You can try accessing your web app by going to your web browser and typing something like your-ip-address:3000. However, this isn't production ready yet, as we need to set up our nginx configuration to point our server to a proper domain, remove the port 3000 from the server address, and add HTTPS.
Step 5 - Set up your initial nginx config
In the previous step, we were able to successfully access our deployed NextJS app through port 3000 of our VPS IP Address. While this setup technically works and you can call it a day, it's not exactly passable for a production environment. This is where nginx comes in, a sort of "traffic controller" for the different web apps on your VPS. For example, if someone visits your domain (let's say its hostari-tutorial.richardparayno.com), nginx will receive that request and forward it to your NextJS app running on port 3000 of your VPS.
To set up a basic nginx config for your server, you need to install it on your VPS first. On VPSes running on Ubuntu, you can run the following command:
sudo apt updatesudo apt install nginx
Once you've successfully installed nginx, it's time to create your nginx config file. To do that, you can run the following command:
sudo nano /etc/nginx/sites-available/nextjsAfter entering the command above, you can start entering the desired attributes of your nginx setup. If this is your first time deploying to a VPS, feel free to copy + paste the code block below. We won't be talking much about nginx in this guide (but if you're interested in a follow-up, please let me know!).
server {
 	listen 80;
 	server_name your-domain.com;  # Replace with your actual domain
 	location / {
     	proxy_pass http://localhost:3000;
     	proxy_http_version 1.1;
     	proxy_set_header Upgrade $http_upgrade;
     	proxy_set_header Connection 'upgrade';
     	proxy_set_header Host $host;
     	proxy_cache_bypass $http_upgrade;
 	}
 }
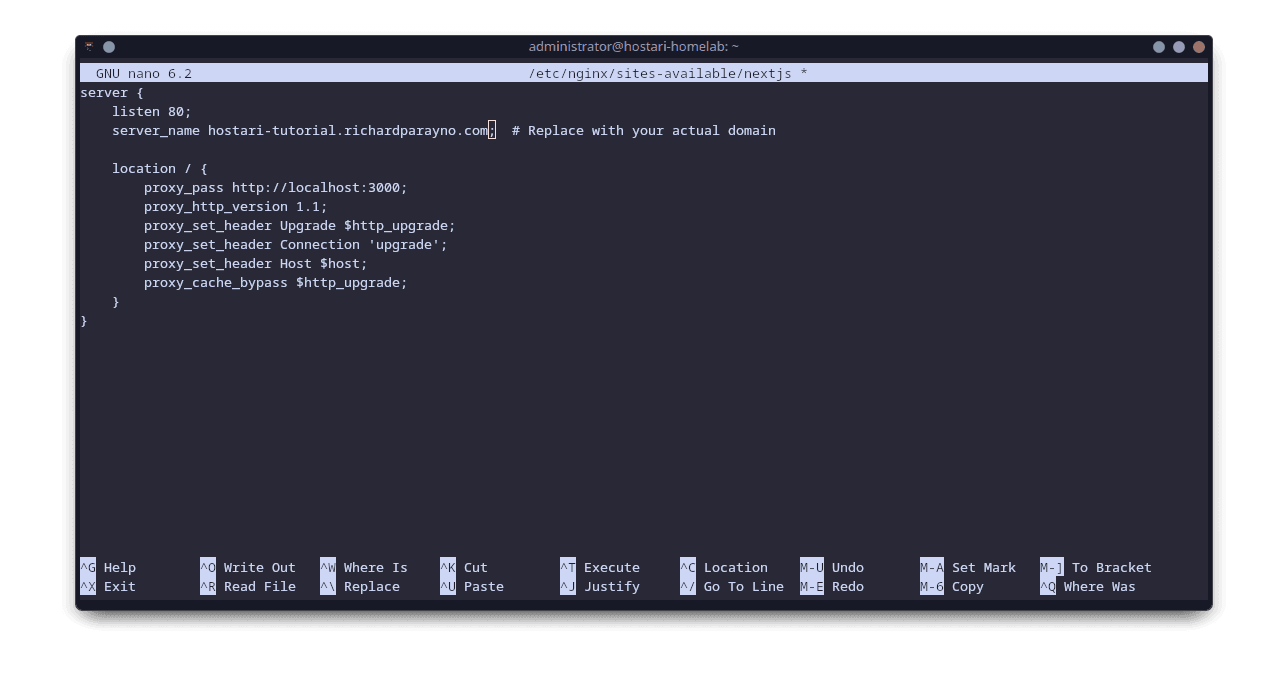
For this tutorial, copy pasting this nginx script is okay.
If you've done everything correctly, you should have an nginx configuration file called nextjs inside your etc/nginx/sites-available/nextjs directory.
After creating your nginx config, we can actually go ahead and delete the default nginx configuration by running the command:
sudo rm /etc/nginx/sites-enabled/defaultNote that if you don't delete the default configuration, you will just see the default "Welcome to Nginx" screen when you visit your website.
After deleting the default configuration file, you should now take your new configuration file (etc/nginx/sites-available/nextjs) and create a symbolic link (or symlink) into your etc/nginx/sites-enabled directory.
sudo ln -s /etc/nginx/sites-available/nextjs /etc/nginx/sites-enabled
Symlink, test the nginx config, restart the process.
After creating the symlink, you should run a test to check if the config is valid.
sudo nginx -t
If you're a little bit confused about what's happening here, its because Nginx uses two different directories for managing your configuration files. sites-available is where you can store your different configuration files, while sites-enabled is where Nginx actually looks for configurations to use. In other words, you can have a number of different configurations in your sites-available directory, but only those in sites-enabled will actually be "activated" and accessible to the Internet.
Now that we've "enabled" the configuration for our NextJS app, you need to restart nginx to actually apply the changes we've made.
sudo systemctl restart nginx
After symlinking your new config, you need to remove the default config, test nginx, and restart the process.
If you'd like to test if your nginx is running properly, you should be able to run your NextJS server again (bun run start) and see your NextJS app if you go directly to your VPS' IP Address on your web browser without having to enter port 3000 into the address bar. We only have a few crucial tasks left to complete your production deployment, such as enabling HTTPs on your server and connecting your domain. In the next step, we'll take a step away from the Linux CLI and go to our domain registrar's DNS settings.
Step 6 - Point your domain to your VPS' IP Address
Now that you've configured nginx to take care of your NextJS app's traffic, you will need to tell the Internet that your domain name (in this case, hostari-tutorial.richardparayno.com) should point to your VPS. Look at your domain provider's documentation on how you can add an "A record" in your domain's DNS settings. The process of "pointing" your domain to your VPS is simple, you just have to create an A record with the following (default) settings:
- Type: A
- Name: @ (this means root domain. if you want to point a subdomain to your VPS instead, you can put that in instead. In my case, since I want the domain hostari-tutorial.richardparayno.com to point to my VPS, I can put in hostari-tutorial.)
- Value: <insert your VPS IP Address here>
- TTL: 3600 (or whatever your provider suggests)
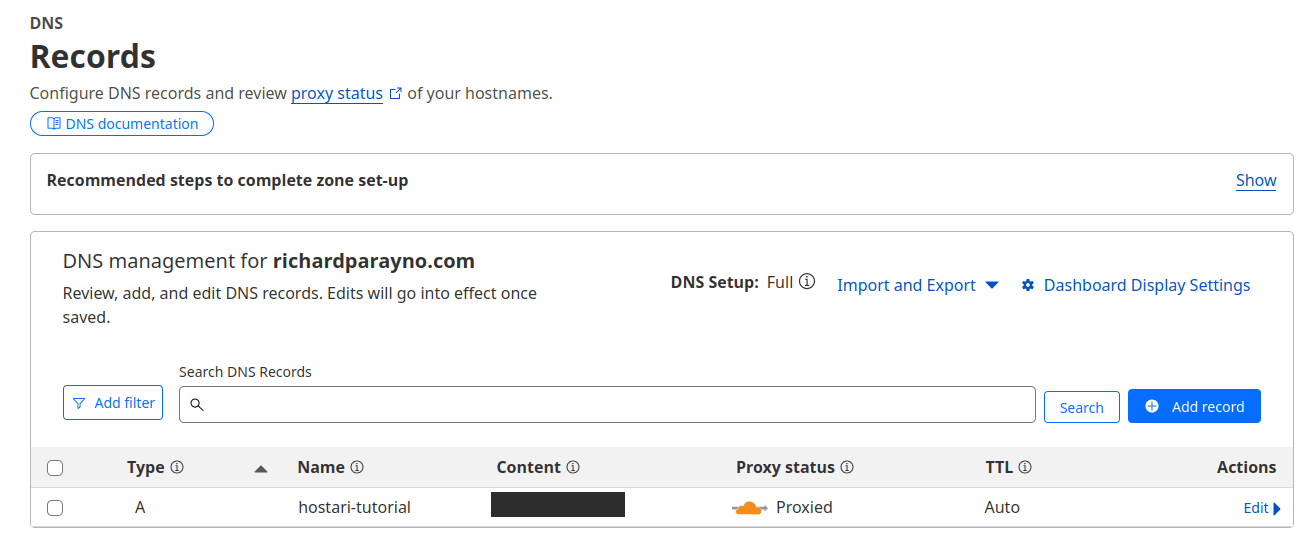
I use Cloudflare to manage my domains and DNS, so your provider's interface may look a bit different. However, the principles remain the same: create an A record, type the name, and point it to the IP address of your VPS.
Step 7 - Add HTTPS to your VPS
This is the final step before our NextJS deployment is finally production-grade and complete. To proceed with adding HTTPS to your VPS, we will be using Let's Encrypt, a free service that provides SSL certificates that auto-renew every 90 days.
First, we need to install Certbot on our VPS, a tool that handles all the stuff needed for Let's Encrypt.
sudo apt install certbot python3-certbot-nginx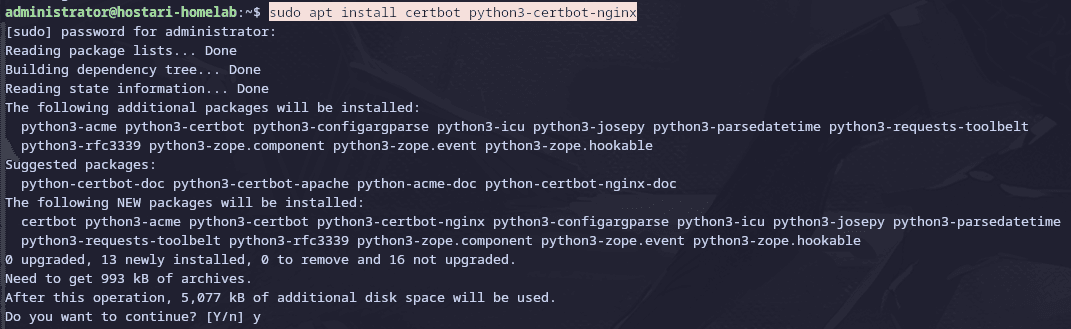
Once Certbot is installed, run the command below. As part of the process, Certbot will ask you some questions such as your email address and some terms of service confirmations.
sudo certbot --nginx -d hostari-tutorial.richardparayno.com (change this to your domain!)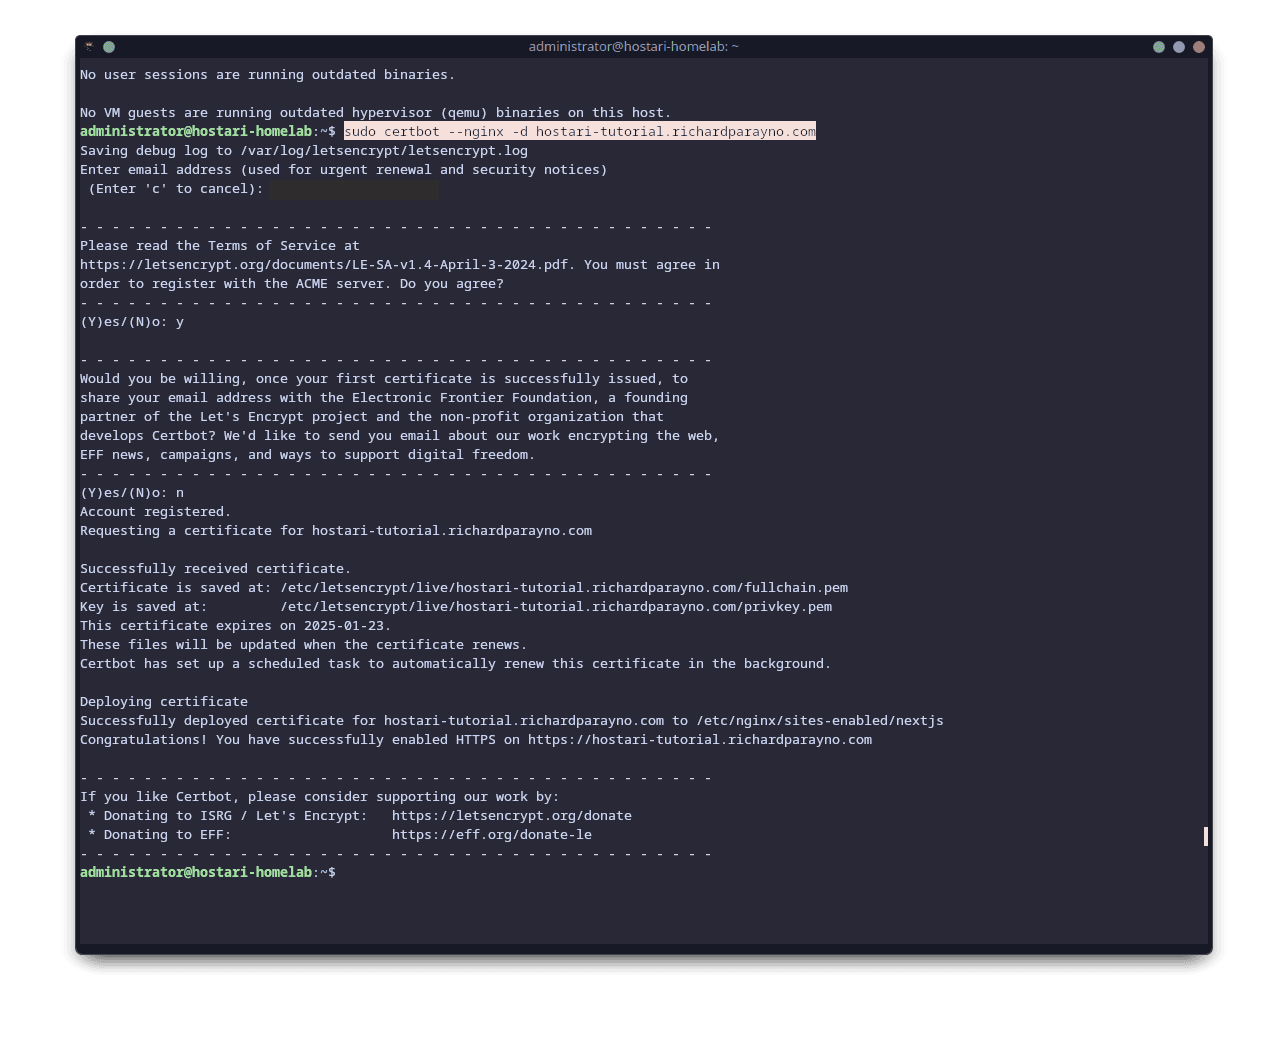
After doing that, run your NextJS server again by calling bun run start and entering your domain name in your browser. If you followed everything in the guide, you should now see your NextJS app deployed on your VPS and secured with HTTPS. Congratulations!
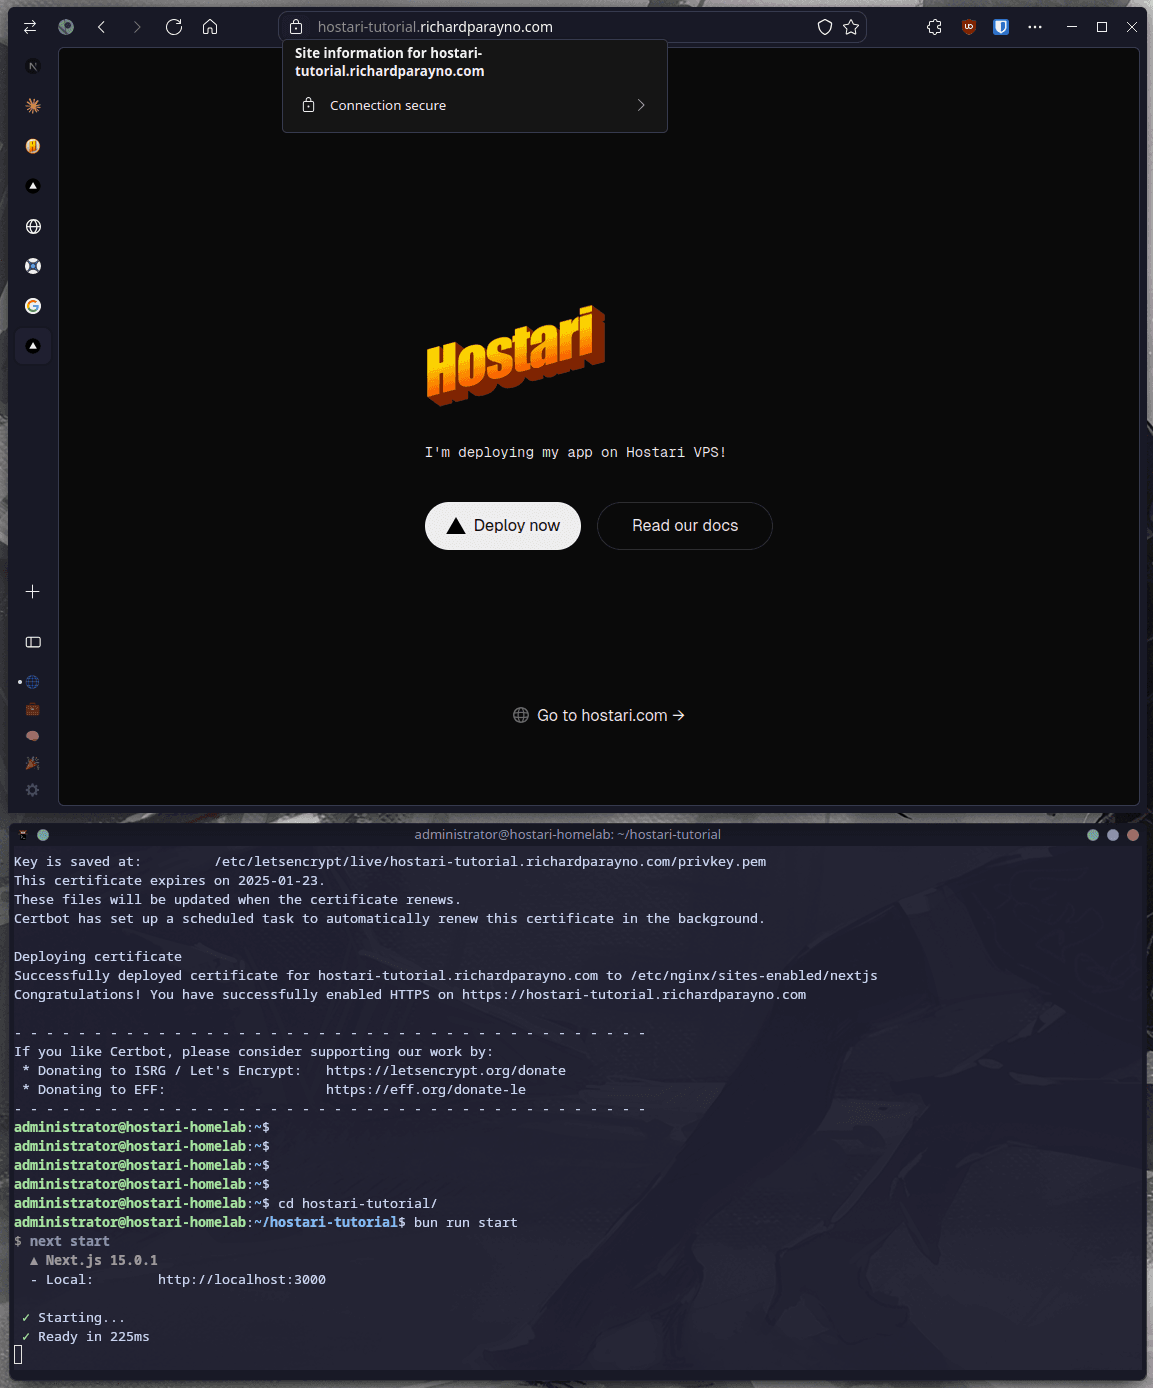
Our starter project is now deployed on the internet, with our preferred domain, secured by HTTPS. Congrats!
Bonus Chapter: VPS Management Tips and Tricks from the Hostari Team
If you're not a fan of the admittedly manual process of setting up your VPS with nginx, writing your config, and manually moving your NextJS codebase from your Git repo to your VPS, there are a lot of tools available that get you close to the simple, one-click deploy experience that's popular in modern PaaS tooling.
I'm personally a fan of the following tools and recommend looking at which ones work best for you:
- Dokku - Open-source PaaS alternative to Heroku
- Coolify - Open-source PaaS alternative to Vercel, Railway, etc
- Dokploy - Open-source PaaS alternative to Vercel, Railway, etc
At Hostari, we're great fans of these tools and use them daily in managing some of our remote VPSes and homelabs. Now that you're familiar with how web deployment works using nginx, you're now well equipped to "graduate" to these tools and improve your developer experience. However, you should always remember that these are tools at the end of the day, and that it would benefit you to learn how these tools work under the hood so you'll be able to fix issues in the future.
Conclusion
In this guide, I talked about why you should and should not self-host your NextJS app on a VPS. If you're familiar with hosting your websites through one-click deploy services like Vercel and Netlify, you might've felt intimidated or surprised by the number of things you need to do to deploy your NextJS app on a fresh VPS. However, it's important to note that the approach I shared today is only one of many ways of deploying your projects to the Internet. Going through the experience of manually setting up your Nginx configuration will teach you a lot about how deploying your apps to the web works and (I hope) that you walk away from this guide with a greater understanding and appreciation of how the server side of things work.
De-mystifying and removing the complexity from how the Internet works is one of our goals at Hostari. We believe that web infrastructure management shouldn't be intimidating and that it's time for affordable, traditional server-based infrastructure to rival the developer experience afforded by PaaS platforms like Vercel, GCP, and AWS. If this sounds interesting to you and you're looking for a VPS provider that actually cares about the developer experience, visit the Hostari website today and get your own VPS!