Valheim is more fun with friends and, while you can connect with PC players by setting up your own dedicated server on the PC, hosting a Valheim dedicated server with Linux is one of the best routes to take if you have the resources to do so.
Contents:
- What Do You Need To Set Up A Valheim Server?
- Why Should You Have A Dedicated Valheim Linux Server?
- Installing Steam For Ubuntu 20.04
- Setting Up A Dedicated Valheim Server On Ubuntu 20.04
- Is Renting A Dedicated Server Better Than A Valheim Dedicated Server on Linux?
What Do You Need To Set Up A Dedicated Valheim Server?
You don’t need expensive hardware to set up a dedicated Valheim server. It is even possible to play Valheim on MacOS.
While the purpose of this guide is to help players looking to set up a dedicated Valheim server on Linux, we should still look at what you would need as far as hardware on PC. The earliest operating system you’d need to set up a server is Windows 7. The comprehensive server requirements to set up a Valheim Linux server are as follows:
CPU: A quad-core processor is the bare minimum CPU needed
RAM: You will need at least 2GB of RAM. 4GB Ram is recommended.
Storage: The minimum storage requirements are 2GB
Operation System: The earliest Windows is 7. You could also use Windows 8 and 8.1. Server 2016, 2019, and Linux.
Why Should You Have A Dedicated Valheim Linux Server?
A dedicated Valheim server is great for those who want to have a little more control when playing Valheim. This is especially true when you’re working with a Linux distribution, such as Ubuntu. Players think about a Valheim server on Ubuntu when they want to manually configure their server and want to have more operational control over its performance.
If you plan on playing Valheim on Linux, you’ll need one of the minimum recommended distros: CentOS 7, Debian 9, or Ubuntu 20.04 LTS.
We’re going to take a look at setting up a Valheim server on Ubuntu 20.04 since it is the easiest to set up for new users and has a rather welcoming community. Ubuntu is also heavily recommended as a distro for Valheim players running LinuxGSM.
Since Valheim is only available on Steam, we’ll need to look at installing Steam in Ubuntu 20.04 to play Valheim.
Installing Steam For Ubuntu 20.04
There are a couple of steps you need to take before you can install Steam for Ubuntu 20.04.

- You need to have Ubuntu 20.04 installed. Alternatively, you can have Ubuntu 20.04 Focal Fossa.
- Have a graphics driver installed such as an AMD Radeon driver or NVIDIA driver. You will need one of these for your Steam installation.
- The ability to execute the sudo command. The sudo command is important for installing Steam directly from the Ubuntu package repository or from the official Steam package.
The easiest method is installing Steam through the Ubuntu repository. If you want to get your Valheim Linux server setup quickly, installing Steam using this repository is also the best way to go.
The first step is enabling the multiverse Ubuntu repository:
$ sudo add-apt-repository multiverse
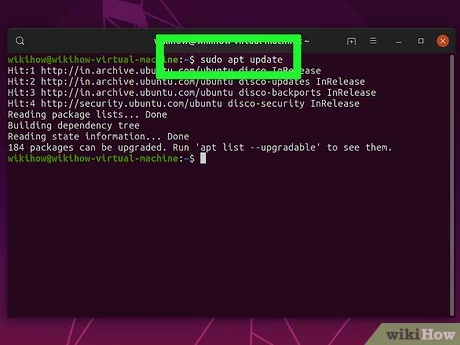
$ sudo apt update
The second step is installing Steam
$ sudo apt install steam
The third step is starting Steam itself with the command:
$ steam
Now that you have the simple part of installing Steam, it’s time to build a dedicated Valheim server on Ubuntu 20.04.
Setting Up A Dedicated Valheim Server On Ubuntu 20.04
Step One: Configuring your time zone.

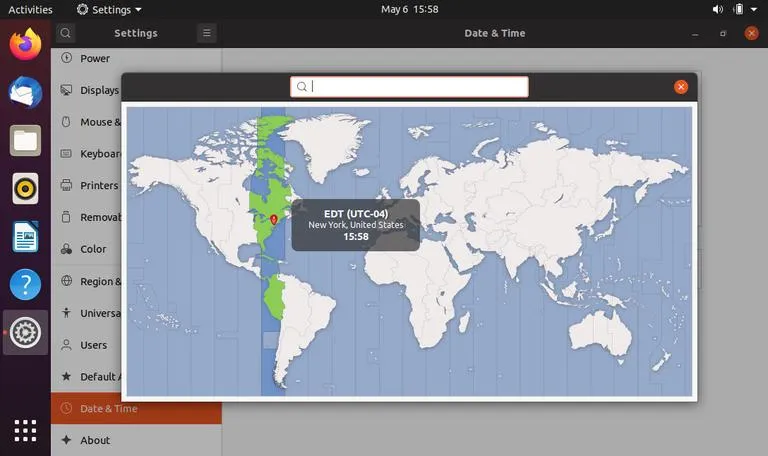
Run the $ timedatectl command to set a time zone since Ubuntu 20.04 does not do this automatically. Using the command timedatectl list-timezones will pull up a full list of time zones that are capable with Ubuntu 20.04. Once you find the time zone you want, you can set it with the following command: sudo timedatectl set-timezone (name of timezone).
Step Two: Ensure Your Ubuntu 20.04 Server Is Updated

Search for the software updater. Once you find it, you should be prompted to update the software. Updating this way is more suitable for newer Ubuntu users.
Step Three: Installing LinuxGSM

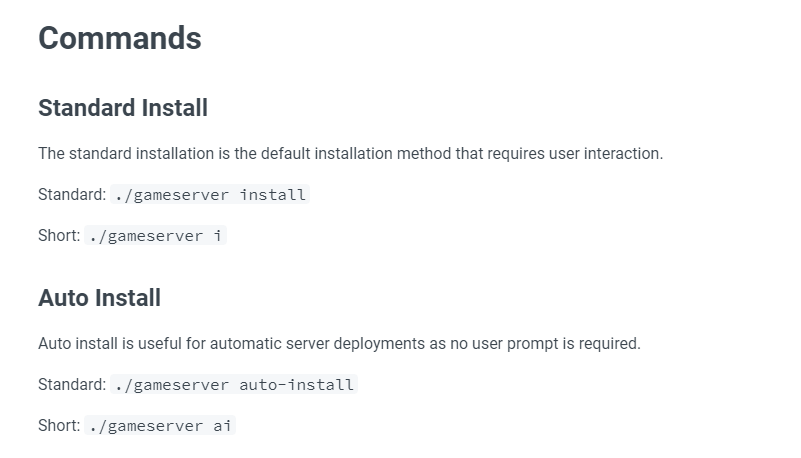
Now, it’s time to get LinuxGSM installed using the commands above. It’s important, when starting with LinuxGSM, to install it as a root. You also want to ensure that the directory you’re installing LinuxGSM into is one you can access.
Step Four: Installing And Configuring The Valheim Dedicated Server On Linux
If you’re struggling with step three, then you can try installing LinuxGSM and the Valheim server using the following command:
wget -O linuxgsm.sh https://linuxgsm.sh && chmod +x linuxgsm.sh && bash linuxgsm.sh vhserver
./vhserver install
Ensure that you’re creating regular backups just in case. After that, it’s time to find the config files using:
cd ~/lgsm/config-lgsm/vhserver
ls
Once you’re there, you can use the common.cfg to configure your Valheim Linux server’s name, password, gameworld, port, and whether it is private or public.
If you’re at the end of this comprehensive guide for setting up a Valheim server on Ubuntu, you’re not alone. A Valheim dedicated server on Linux sounds great on paper, but those who don’t want to deal with the headache of maintaining their own servers should consider Valheim server hosting.
Is Renting A Dedicated Server Better Than A Valheim Dedicated Server on Linux?
Instead of going through the headache of trying to set up a Valheim Linux server, you should consider the effortless alternative of instantly setting up a server through Valheim Server Hosting.
You may assume you won’t have the option to customize your server unless you have a Valheim dedicated server on Linux, but you can still set up custom controls with a rented server.
You won’t have to worry about managing a server on your own hardware, security issues on Linux, or any other issues that can keep your dedicated Valheim server in the dark. Valheim Server Hosting has you covered so you can play Valheim on a dedicated server with your friends without the headache.

