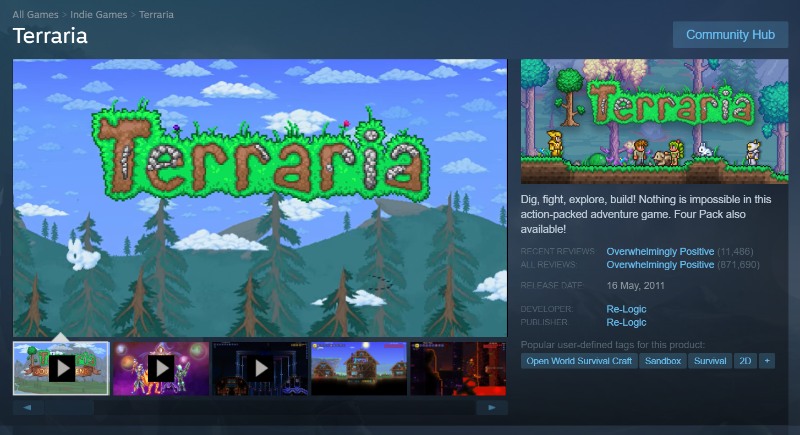
Are you a fan of Terraria?
If you're looking to explore, craft, and build with friends, you'll need your own dedicated server. But don't worry, setting up and configuring your server on Linux doesn't have to be complicated. In this guide, we'll walk you through the process of setting your server up, so you can start hosting your own Terraria lobby and enjoying the game with your friends.
And in case that’s a bit too technical, we’ll share a simpler alternative—renting your own dedicated Terraria server from Hostari!
What Is a Terraria Linux Server?
A Terraria server is just a machine that allows you to connect with other players in the same game world. A dedicated Terraria server only hosts Terraria, meaning there aren’t any background programs or tasks impacting your in-game experience.
Running the server on Linux is similar to running it on Windows. That said, there are key differences when it comes to security (Linux may offer better security than Windows) and setup.
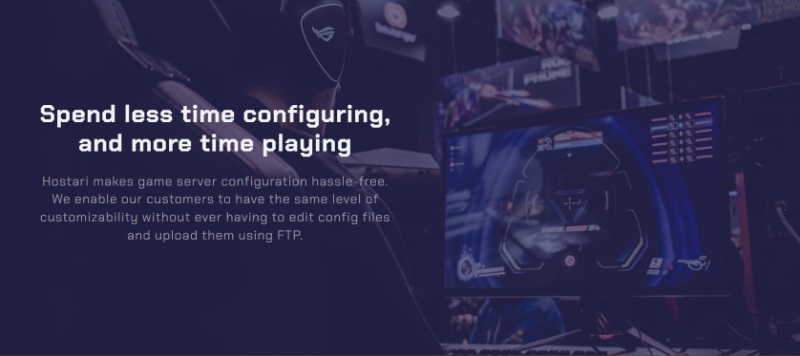
The setup process will look different depending on the server provider you rent from. If you’re looking for easy server management, platforms like Hostari that offer hassle-free configuration are your best bet.
How To Use Terraria Server on Linux
Now that we’ve gone over the basics, let’s move on to the actual process of using a Terraria server on Linux.
Install and Configure Terraria on Linux
To get Terraria working on your Linux PC, you’ll need to enable the multiverse Unbuntu repository by inputting:
Sudo add-apt-repository multiverse
Sudo apt update
Then, install Steam and launch it by inputting:
Sudo apt install steam
Terraria isn’t a free game, so you’ll need to buy a copy before you can install it. Once you’ve got the game downloaded, it’s time to get yourself a Terraria server. There are a ton of providers you can turn to for your own game server, and we’re going to go through some of those now.
Rent a Dedicated Server
If you’re trying to get a Terraria Linux server, the easiest option is to rent a dedicated game server from a server hosting platform like Hostari. These services usually come with a bunch of useful features that make server setup and customization simple and intuitive.
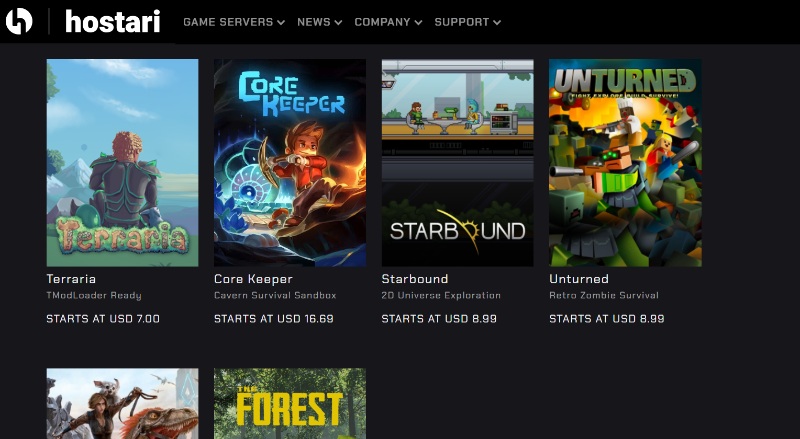
The server provider you choose to needs to support Terraria (obviously), so go to their website and search for the game to see if it’s supported.
Place Your Order
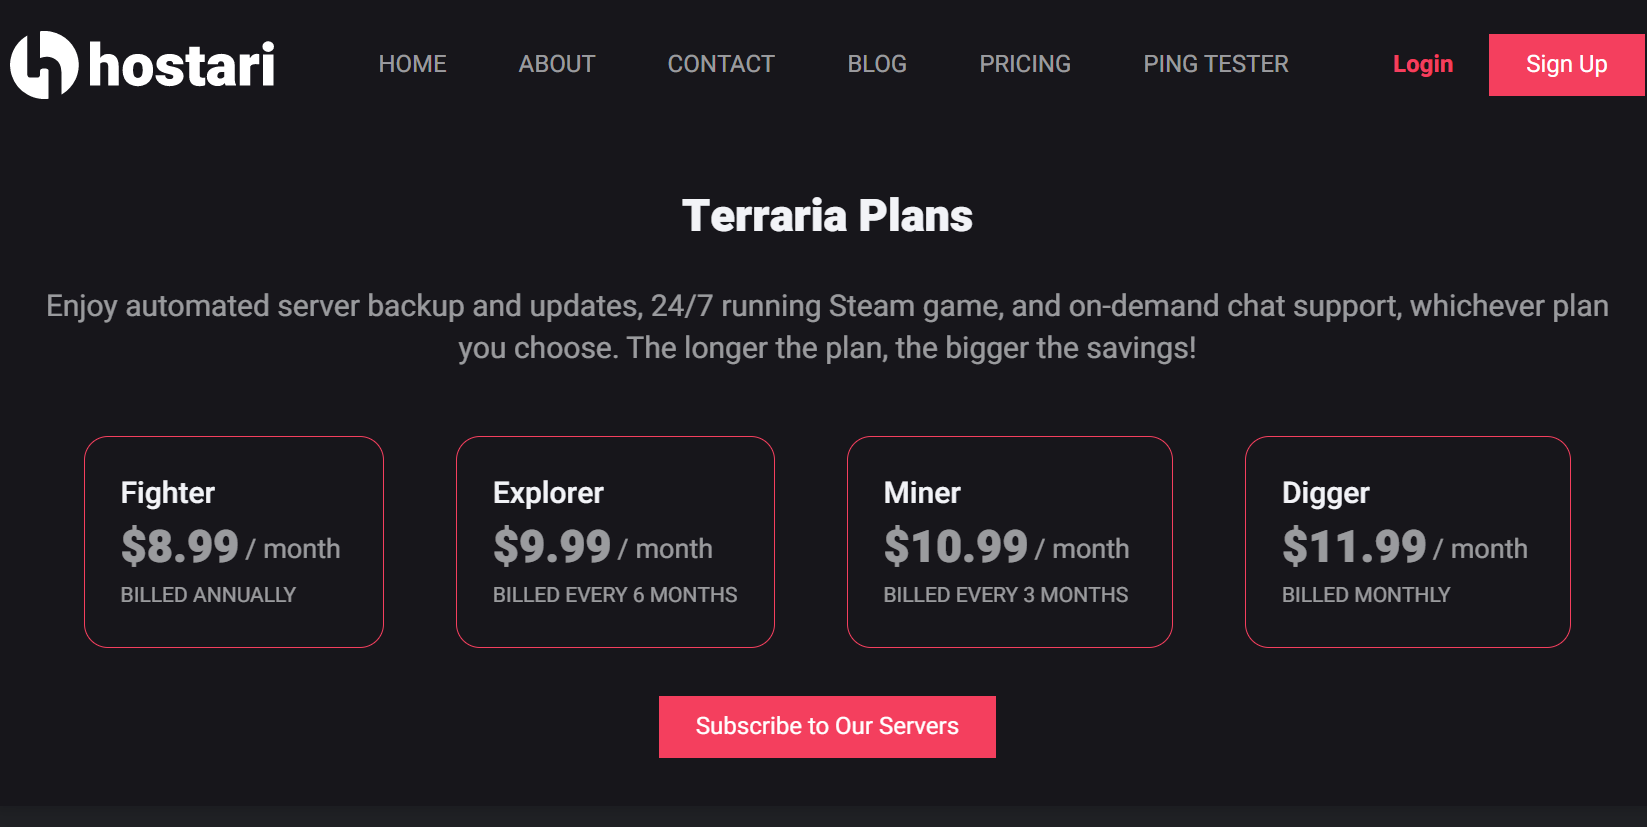
Before you can start setting up your server, you need to place your order and install the server onto your machine. Head over to Hostari’s website and scroll until you see Terraria.
Click it, and you should be taken to the Terraria pricing page. Then all you need to do is sign up for 24 hours of free access to your dedicated Terraria server!
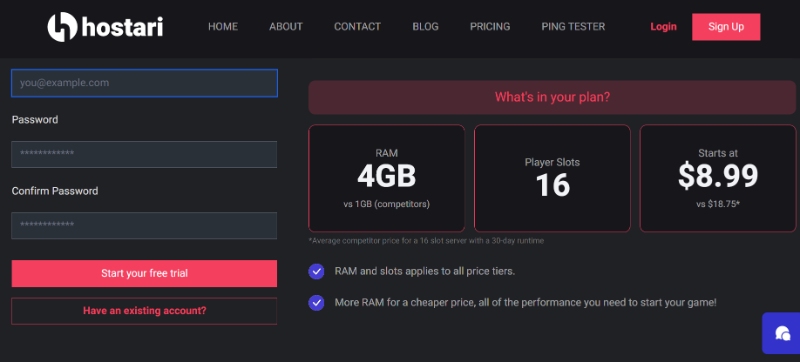
You can also go to Hostari’s homepage to view the different pricing plans for Terraria.
Instant Setup
Hostari’s dedicated servers have a feature called instant setup, that automates the setup process for you. That means your server should be up and running in a matter of minutes with little to no effort on your part. If you encounter any issues, you can contact customer support for assistance 24/7.
Steam Source Dedicated Servers
Another way of getting a Terraria server is by using Steam. Most popular multiplayer games available on Steam (including Terraria) should be supported. You can make a game server by installing the relevant server files using the SteamCMD client.
Install SteamCMD
If you’re using a dedicated server on Steam, you need to install SteamCMD, which is a command-line version of the normal Steam client. You can use it to install and update dedicated server programs. For Linux, it’s best to create a new user instead of running SteamCMD on your main user account for security reasons.
Create a Steam Account For Your Dedicated Server
Next, you need to create a new Steam account specifically for running your server. If you use your normal account, you won’t be able to use it to join the server.
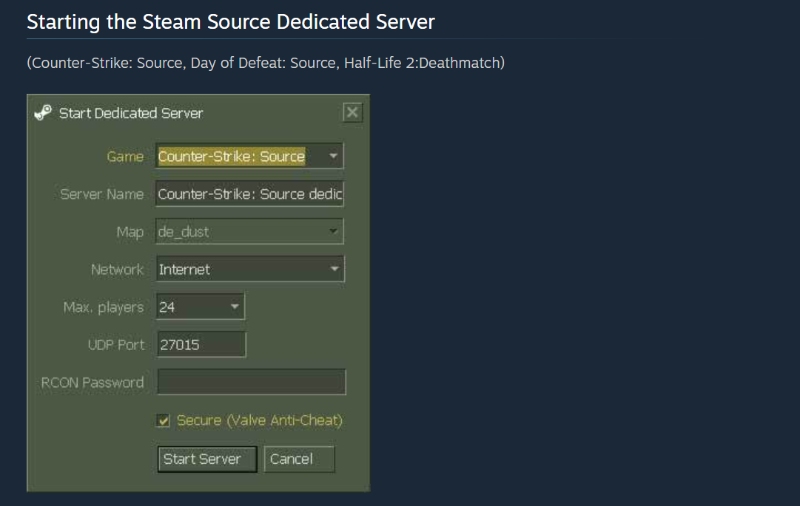
When running a dedicated Steam server, you will need to configure a few settings first:
Game
Server Name
Map
Network
Max. Players
UDP Port
RCON Password
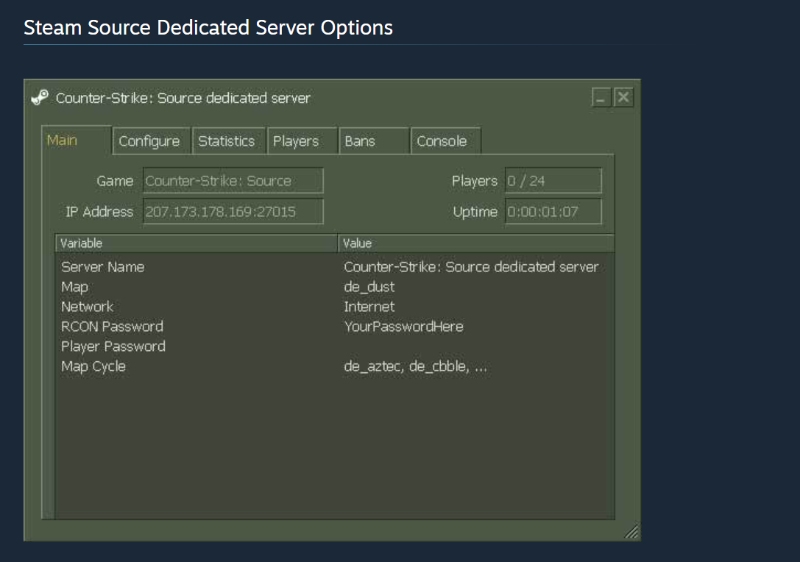
You can also configure and manage your server from its settings, which include a ban interface, console, and statistics. You can also monitor things like uptime and IP address.
Install Terraria Server Files
Alternatively, if you're looking for a basic Terraria server, you can install the files from their fandom website. They’re always being updated, so you should check in periodically in case your version becomes outdated or incompatible with your game.
Install & Configure Terraria Tarball
You can install the latest Terraria server file for free — just make sure it’s compatible with your version of the game. After downloading the file, unzip it and navigate to the Linux folder.
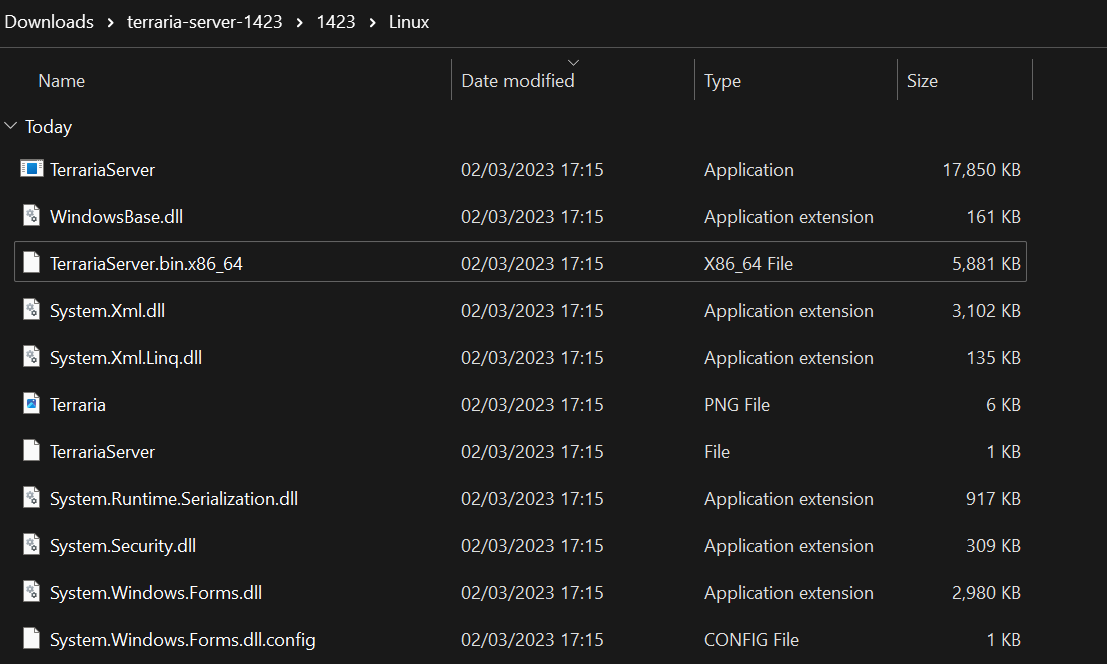
After extracting the files, enter this command to add executable permissions:
sudo chmod +x ~/1423/Linux/TerrariaServer.bin.x86_64
You can create and use server configuration files to help you set up your Terraria game world, including world creation, difficulty level, and more. Just create a txt file in the Linux folder and input the relevant information.
Here’s an example:
world=/srv/terraria/Worlds/ExampleName.wld
autocreate=1
worldname=ExampleName
worldpath=/srv/terraria/Worlds
Install & Update Tools
Now that you’ve got your server installed, make sure you have the tools necessary to actually run it. This also includes updating those tools to ensure they work properly. Run these commands to install and update your tools:
sudo apt install -y wget tmux unzip
sudo apt update
Run Your Terraria Server
Finally, it’s time to actually run your Terraria server.
Launch the server using this file:
./TerrariaServer.bin.x86_64
Put all configuration and world files in this location, so the server can access them:
~/.local/share/Terraria/Worlds/
Install Screen or Mtux
You can also run your server in the background using Tmux, which is a more recent version of Screen. Screen is an interactive console that's part of Terraria's server management. You can install Screen by running the following command:
sudo apt install screen
Alternatively, you can choose to install Mtux instead. After installing Screen or Mtux, start a Terraria session using the console. Then, enter this key combination to leave the server active in the background:
Ctrl+B and D
Best Practices For Server Management
Make Sure to Update Your Dedicated Servers
Always ensure that your server isn’t outdated or incompatible with your game. Regularly check for updates and install them as needed. But before you do, make sure to notify all other players on the server first!
If you are renting a dedicated server from Hostari, you don’t need to manually update your server – we take care of all the annoying details for you!
Always Back Your Server Up
Always remember to back up your server and save your progress regularly. If you happen to experience any technical issues, you won’t have to worry about losing too much progress. This is especially important for multiplayer games like Terraria — one crash and everyone can lose their builds.
Monitor Player Behavior
As a server host, it’s your job to look out for cheating or inappropriate behavior among players. You can choose to ban any problematic players from the server to ensure that the game is a fun for everyone.
Communicate With Other Players
When customizing Terraria with mods and such, you should make sure it’s a group vote. The gameplay experience should be fun for everyone, not just you. This means you have to talk to the other players and ensure they’re all happy with the changes you’re going to make.
Protect Your Server Against Cyberattacks
While Linux is more secure than Windows, there’s still a risk of hacking since Terraria is an online game. It pays to have special protection against cyberattacks, which means getting some kind of security, like DDoS protection. It will keep your data safe from intruders. Since your server hosts multiple people, security should be a high priority.
Conclusion
Terraria is a popular sandbox game that can be played on a ton of platforms, including Linux. Setting up a dedicated Terraria server on Linux can be a challenge, depending on the method you choose. You can use SteamCMD to create a server and install server files, or rent a server from a hosting platform like Hostari.
At Hostari, we aim to simplify the server configuration process by eliminating the need for files and FTPs. Start your free trial today and make your Terraria server setup quick and easy.
Check out our blog on why you should pick Hostari as your Rust Server Host.