Want to play V Rising multiplayer on your very own server? As one of the hottest games to get released in 2022, this vampire game developed by Stunlock Studios features a multiplayer mode that is even more fun than playing solo.
This step-by-step guide will show you how to set up your own dedicated V Rising server. In order to fight alongside other vampires to beat the greatest threats of Vardoran, you’ll need a great dedicated server that doesn’t lag especially during the most important moments.
If you want to take the hassle out of the process, then let Hostari’s V Rising dedicated server do the heavy lifting for you.
What is a dedicated server?
Unlike with a normal server, a dedicated server does not require the server host to be playing the online game at the same time as you are.
You can set up the dedicated server on one system and play from another. That way, both the server and the game can give you optimal performance.
When you set up a dedicated server, the game doesn’t lag and downtime is minimal.
Set up free server using SteamCMD
- Enter the term Steamcmd into Google and click on the link: https://developer.valvesoftware.com/wiki/SteamCMD
- Open the link and you will see versions for Windows, Linux and a number of other operating systems. In this guide, we are going to focus on how to make a V Rising dedicated server setup in Windows.
- Click on the Windows link.
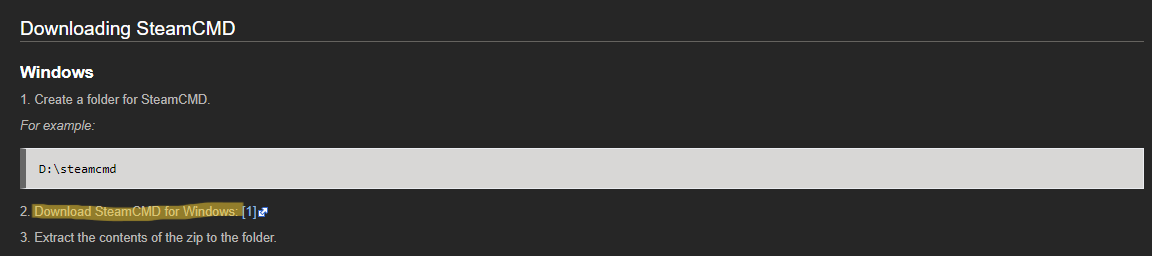
- Click on the link that says Download SteamCMD for Windows.
A zip file will download, which you can extract into a folder on your desktop.
If you are a fan of keeping things organized, create a folder named SteamCMD and unzip the files onto the folder.
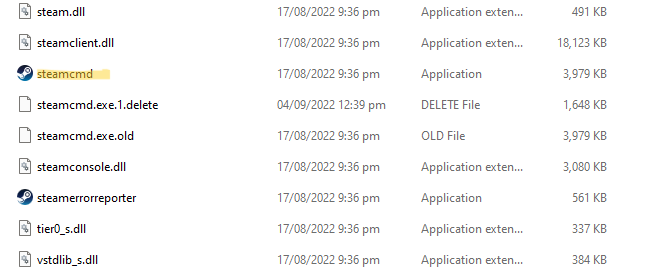
- Click on Steamcmd.
The download will complete automatically.
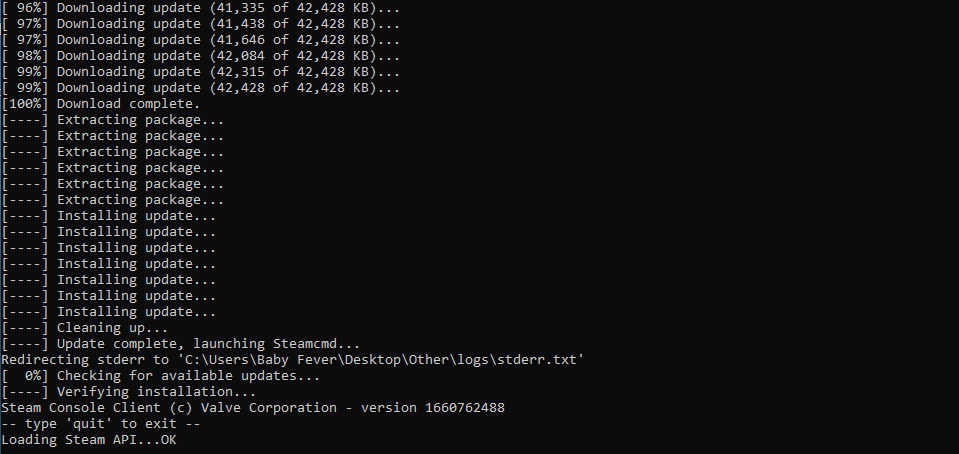
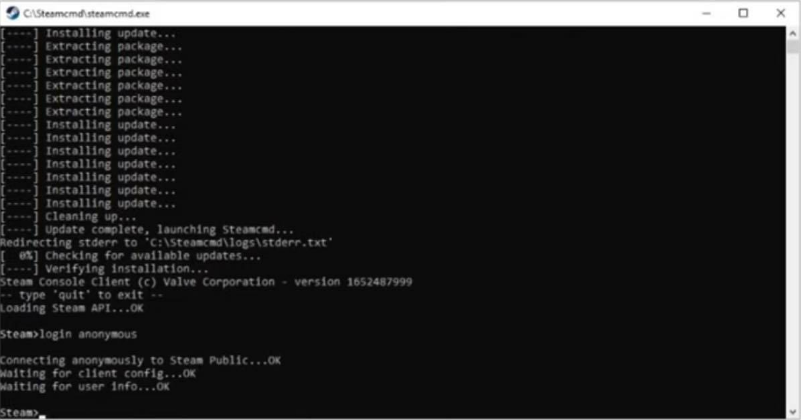
- Once it is finished, type the words ‘login anonymous’ (see image below) and hit the Enter button.
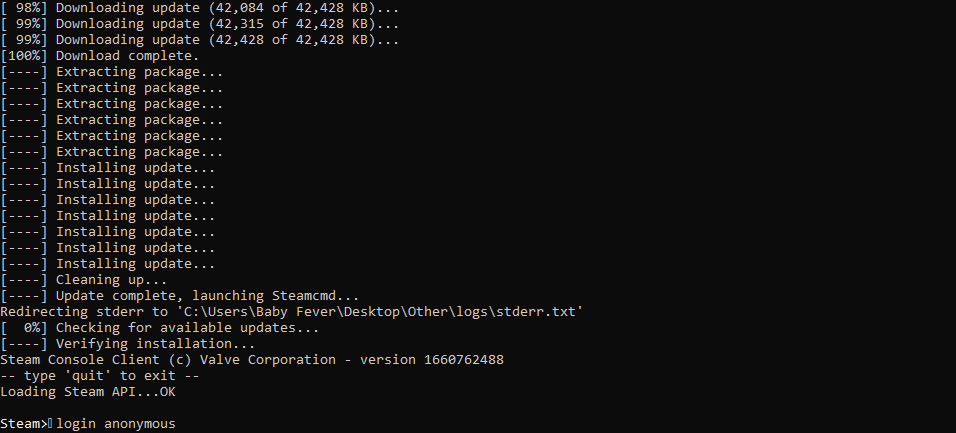
You will then connect to Steam Public anonymously.
Note: If you require ownership, you will have to login to your steam account. In other words, you won’t be able to sign in anonymously.
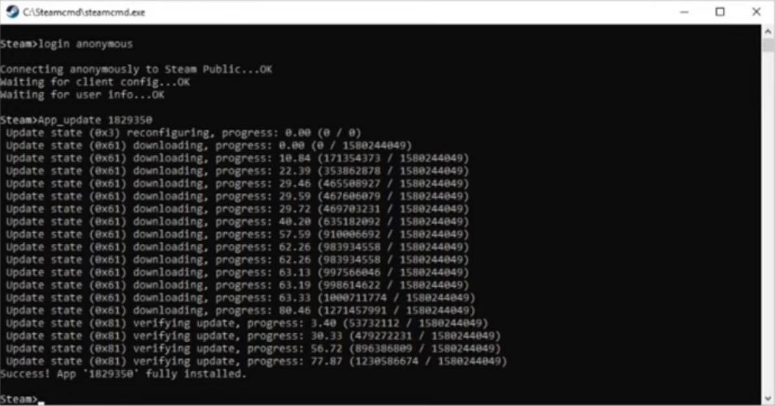
- Now type App_update_1829350.
- Press Enter.
The server files will start downloading now.
Note: The ID of the V Rising Dedicated Server is 1829350
Once the download is complete, you will see the message: Success! App 1829350 fully installed.
Note: When you need to update the server, follow the same steps.
- You will now have a folder called steamapps.
- Open it and click on the folder that is labeled ‘common’.
Now you will be able to see your dedicated server files.
- Click on VRisingDedicatedServer.
You should now be able to see all the files for the V Rising game.
Note: You will see a text file named README. It contains a link labeled ‘V Rising Dedicated Server Instructions’.
Start the server
V Rising comes with an example file to start the server. You should use Notepad++ for this step.
- Click on the file that says Start Server Example and select the option Edit with Notepad++. You will see the following:
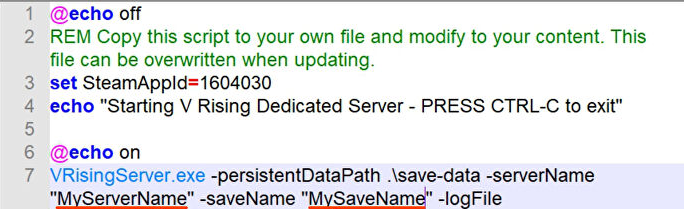
- You can change the serverName and saveName by clicking on MyServerName and MySaveName respectively.
Tweak your set-up
- Open the VRisingServer_Data folder.
- Open the StreamingAssets folder.
- Open the Settings folder.
- Click on ServerGameSettings file and select the option Edit with Notepad++.
- From here you can set the parameters for the server itself (Parameters can be damage variants, health etc).
Change your server settings
- Open the VRisingServer_Data folder.
- Open the StreamingAssets folder.
- Open the Settings folder.
- Click on the file ServerHostSettings and select the option Edit with Notepad++.
- Now set your server’s Name, Description, Port, and QueryPort.
Note: If you want people to connect to your server, whatever port you choose will have to open your firewall and your router. If you fail to change your firewall settings, the server will not show up in the server browser.
- Set your Password and change any other settings that you need.
- Once that’s done, click on File and then Save.
Edit and ban users
- Click the VRisingServerData folder.
- Open the StreamingAssets folder.
- Open the Settings folder.
- Click on the Adminlist file when you want to make someone an admin.
- Edit the file named ‘banlist.txt’ when you want to ban specific players from the game.
Join the server
- Select Play and go to Online Play.
- Click on Find Servers option at the bottom-right corner of your screen.
- Click on Display all Servers and Settings.
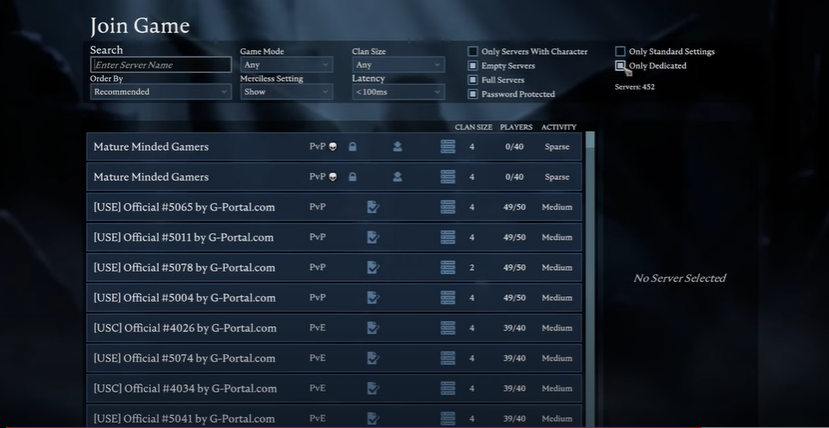
- Uncheck the boxes at the top-right corner (if you are not sure about them).
- Type your server name in the Search box and click on your server.
- Enter your password and you’re in!
The Hostari alternative
If you want your own V Rising dedicated server, but don’t have the time to set one up, then Hostari can help. We provide reliable hosting for servers of any size and you can connect to their high-speed dedicated servers wherever you are in the world.
All Hostari backups are automated and they operate a variety of server plans that let you choose the most affordable option.
Why choose Hostari over alternatives? Well:
- We have a dedicated server specifically catering to V Rising gamers, meaning that we understand what your needs are better than other gaming servers.
- Setting up your dedicated server is hard and can negatively affect your computer’s lifespan. It also leads to higher energy and internet bandwidth costs. If you have other people using the same internet access, then the overall connection speed may suffer.
- Have a dedicated server even when you’re not playing.
- It’s cost effective. Having a dedicated server may be cheaper in the long run than if you have to use your own hardware. With ours, we offer monthly subscriptions that you can easily cancel.
It’s all very simple, but if you do run into a problem, the Hostari service provides 24/7 customer support that you can access through your dashboard.