ARK: Survival Evolved is a staple among adventure survival games, and it remains popular today. There is even a sequel in the making called ARK 2. As is standard with MMOs, ARK benefits from having a dedicated server that connects you and your friends to the same lobby.
Dedicated servers can be rented from hosting platforms like Hostari (which makes server configuration effortless) or set up manually using the steps we’ll cover below.
Before we get into all that, let’s dive deeper into the purpose of a dedicated server.
What Is a Dedicated Server in Gaming?
Dedicated servers act as hosts for various PC games. Essentially, they are machines that exist solely to run games for you. This means all their storage and power is dedicated towards game performance and connecting players together.
One of the easiest ways to obtain a dedicated server is by renting one for a monthly fee. That way, you get access to high-quality hardware, smooth game performance, and fast connection speeds.
Non-Dedicated vs. Dedicated Server for ARK
At this point, you may be wondering — what makes a dedicated server different from a non-dedicated server? Well, a non-dedicated server is a machine that serves functions other than game hosting. If you’re using your personal computer to host an ARK game, it’s a non-dedicated server because you’re probably also using it for browsing the web and storing files.
Since the CPU and storage are split between multiple tasks, your ARK experience can suffer from lag and high latency (poor connection quality). That’s why many gamers prefer to use dedicated servers for ARK.
Dedicated server hosting platforms are also known for providing many additional features along with their servers, which can help you with server management. For example, most of them offer:
Advanced Security
24/7 Support
Automated Setup
How to Set Up an ARK Dedicated Server
Step 1: Consider System Requirements
Before you even purchase your server, make sure you know what system requirements you need. These can vary based on a few factors, such as:
The size of your lobby
What mods or plugins you’re planning to use
How far away you are from data centers (the further you are, the lower your connection quality)
You can use the factors above to determine your system requirements:
How much memory/storage do you need
How many player slots do you want on your server
CPU clock speed
Internet bandwidth
To make things easier for you, we’ve listed the basic requirements for an ARK dedicated server below:
CPU (2 physical cores with over 3 GHz clock speed for smaller servers — larger ones will require more power)
25-30 GB storage
6-8 GB RAM
100 Mbps internet speed
64-bit OS
Step 2: Install the Steam Server Software
There are various ways to obtain a dedicated server for ARK, and one of them is through SteamCMD (Steam Console Client). This program is a command-line version of the Steam client, which mainly serves to install and update dedicated servers from Steam.
Follow these steps to download SteamCMD:
Open File Explorer and select the drive in which you wish to install SteamCMD.
Create a new folder and name it ‘SteamCMD’.
Install SteamCMD by clicking on this link.
Once you have downloaded the client, extract the ZIP file into your SteamCMD folder.
Launch steamcmd.exe to start the program.
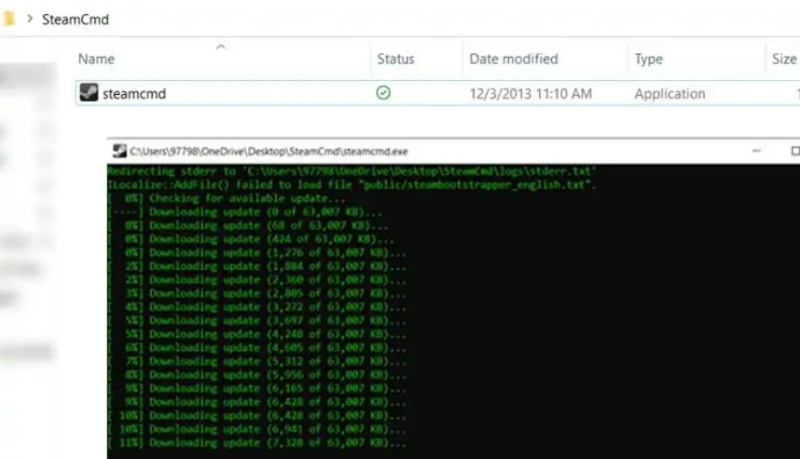
Leave the program running until it finishes setting up.
Exit the program by typing Quit.
Step 3: ARK Dedicated Server Installation
Now it’s finally time to get your ARK dedicated server. There are a few ways to go about this.
Rent a Dedicated Server From a Hosting Platform
You can purchase a dedicated ARK server from Hostari and gain access to various features, such as DDoS protection and instant setup (i.e., server setup is automated for you). Just visit Hostari’s website, and scroll until you find ARK’s pricing plans.
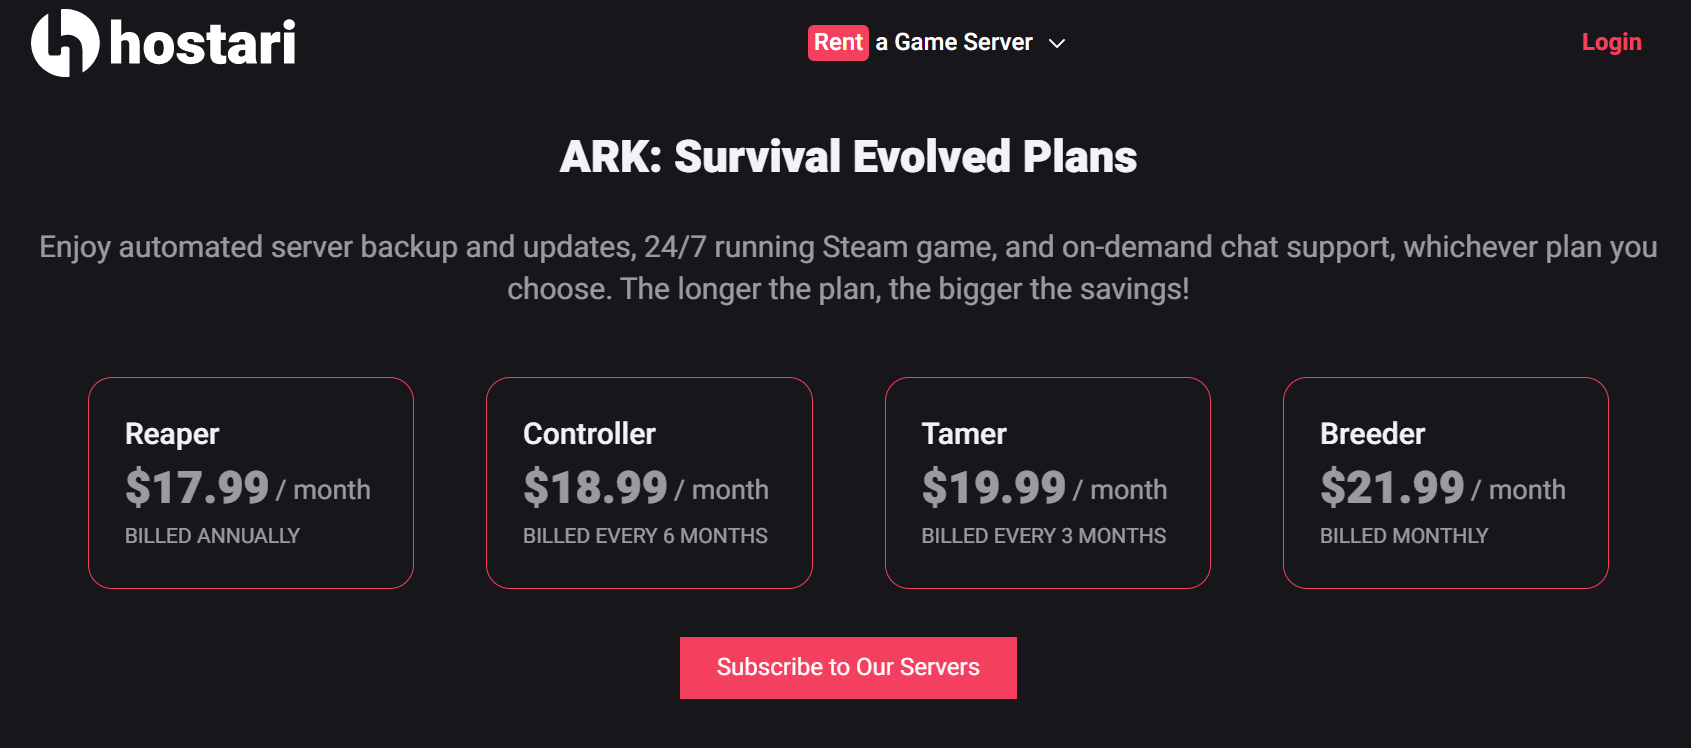
Click on Subscribe to Our Servers, and sign up for the 24-hour free trial to get your server up and running within minutes. You don’t need to link any payment methods until the 24 hours are up, so it’s completely risk-free.

Use SteamCMD to Install the Dedicated Server Files
Another way to get a dedicated ARK server is through SteamCMD. Steam offers dedicated server support for many of its games, including ARK. Before you install the server, create a folder for it first. You should have a minimum of 15 GB free (the server files take up approximately 10 GB).
Launch SteamCMD, and download the server files by inputting:
login anonymous
force_install_dir C:\ark-server\
app_update 376030 validate
To customize the server settings to your liking, you need to create a script.
Windows
For Windows, this will be a batch file (name it start_server.bat). Place the file in ARK_server_folder/ShooterGame/Binaries/Win64/.
Here’s an example script:
start ShooterGameServer.exe "TheIsland?SessionName=My ARK Server?ServerPassword=MyPassword?ServerAdminPassword=MyPassword?Port=7777?QueryPort=27015?MaxPlayers=10"
exit
Linux
On Linux, you’ll be creating a shell script (call it server_start.sh) and placing it in ARK_Server_Folder/ShooterGame/Binaries/Linux/:
#! /bin/bash
./ShooterGameServer TheIsland?listen?SessionName=ARK Server?ServerPassword=JoinPassword?ServerAdminPassword=AdminPassword -server -log
Once you’ve finished the script, type the following to make it executable:
chmod +x server_start.sh
Now all that’s left is to run the scripts you’ve made.
Step 4: Port Forwarding and Firewall
Port forwarding is an important step when it comes to game hosting — it allows you to connect to players outside your home (i.e., people on a different network than you).
Create a New Port Rule
If you’re using Windows, press Windows-key + R to open the command function.
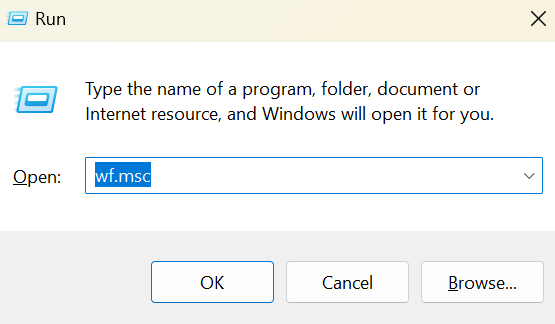
Type wf.msc and press Enter to open up ‘Windows Defender Firewall With Advanced Security’.
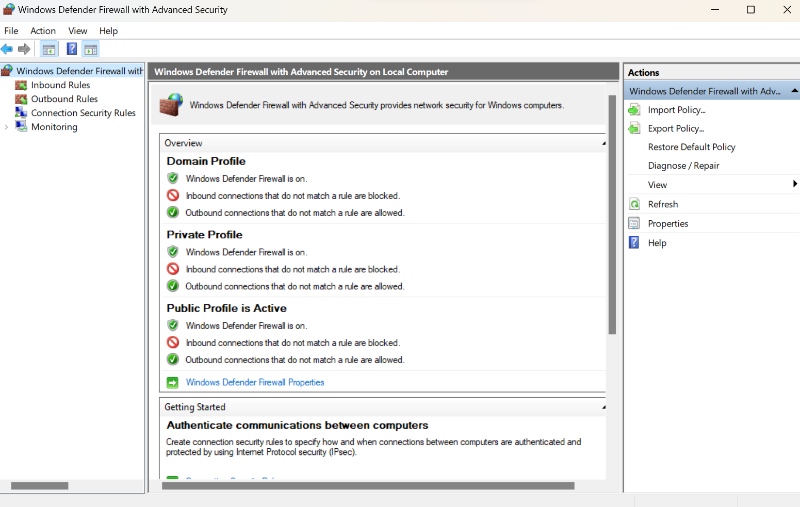
Select Inbound Rules from the left side panel, then click New Rule.
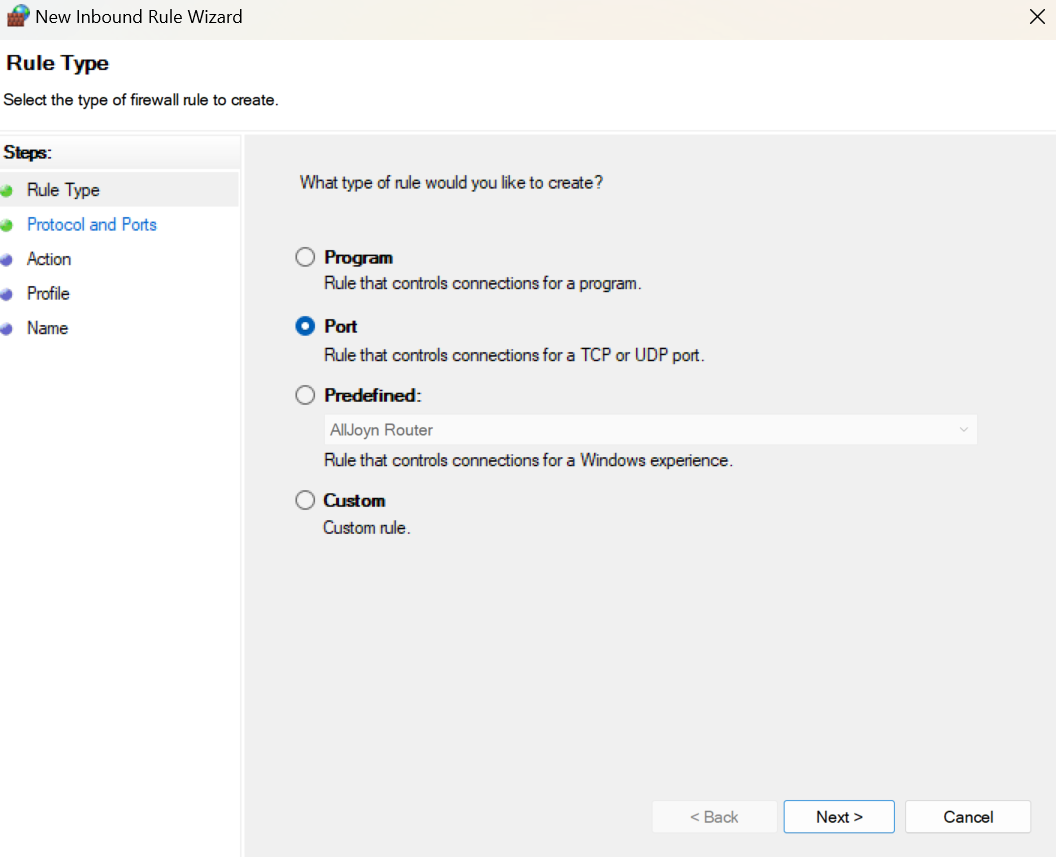
Select the Port option, and click Next to move on.
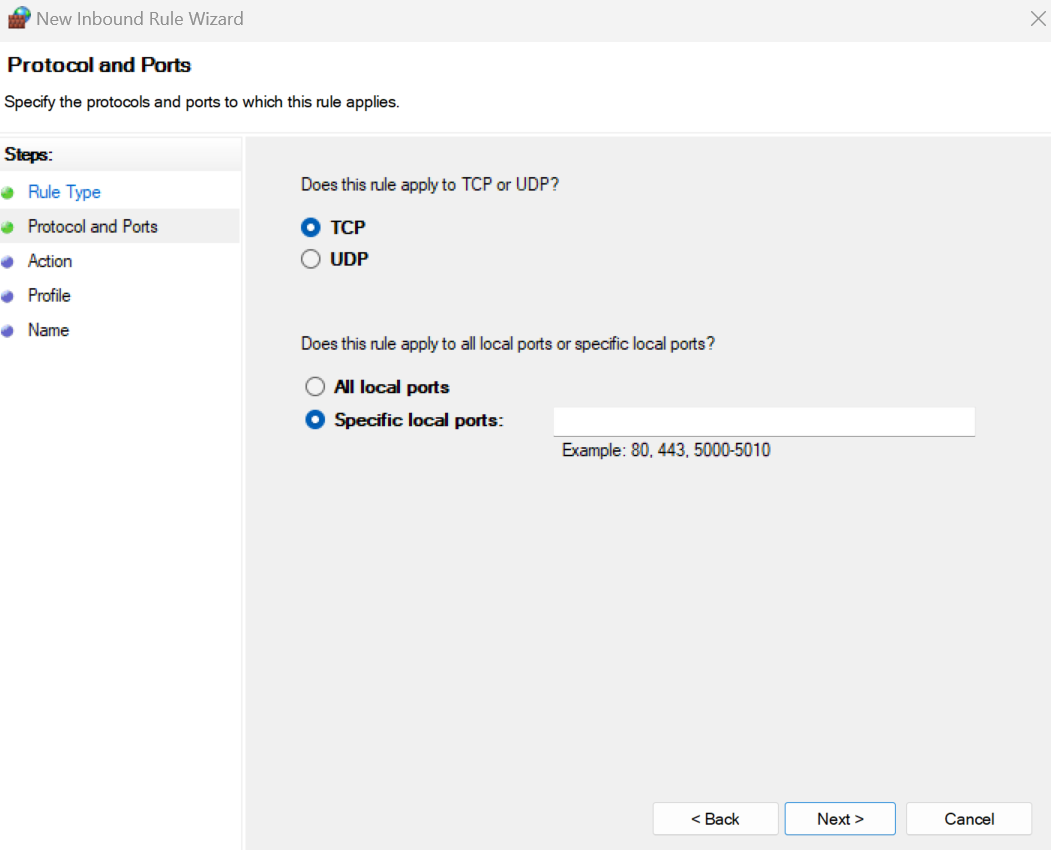
Leave the TCP option selected, and type out the relevant port numbers in the Specific Local Ports section. For example, 27020 is the RCON port. Separate different ports with a comma. Once you’re finished, move on to the next step.

Make sure Allow the Connection is selected, and click Next.
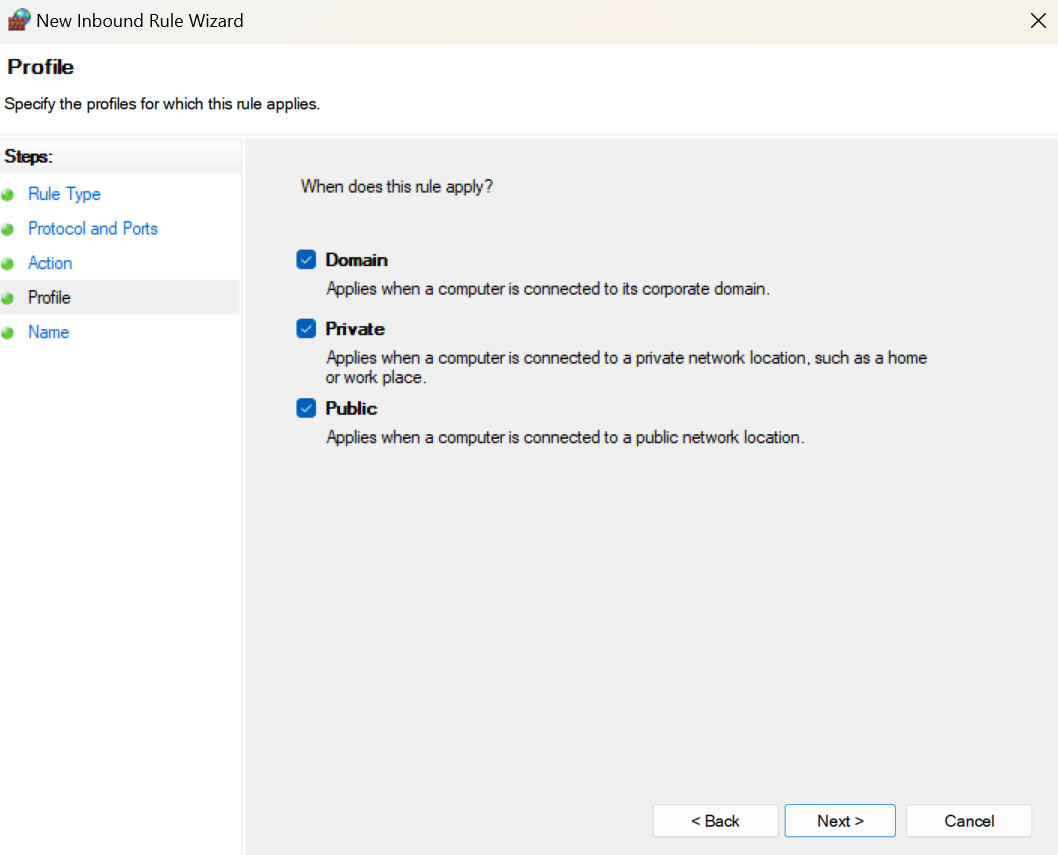
Check all the relevant boxes to control when the rule applies. Then, move on to the final step.
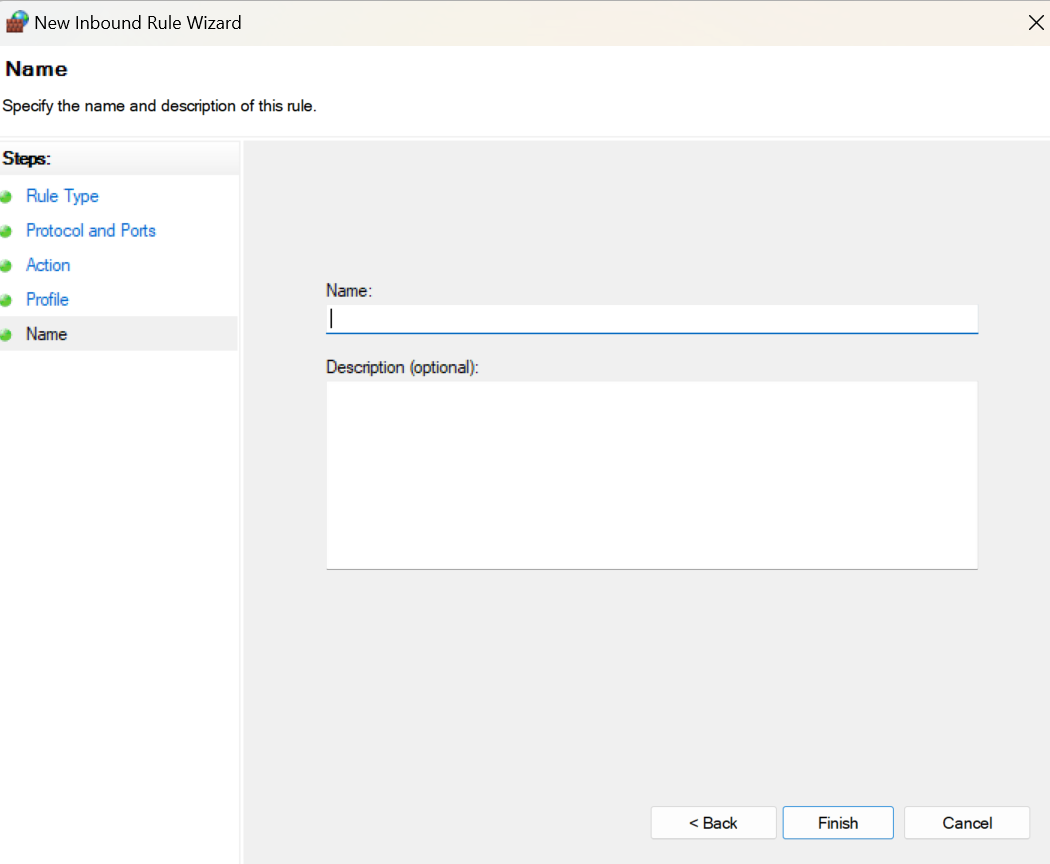
Make sure Allow the Connection is selected, and click Next. Check all the relevant boxes to control when the rule applies, then click Finish. Repeat this entire process but change TCP to UDP, and enter the following port numbers in the Specific Local Ports section:
7777 (game port)
27015 (query port)
7778 (raw UDP socket port)
Edit Firewall Settings
After creating the UDP rule, close the program and launch ‘Windows Defender Firewall’.
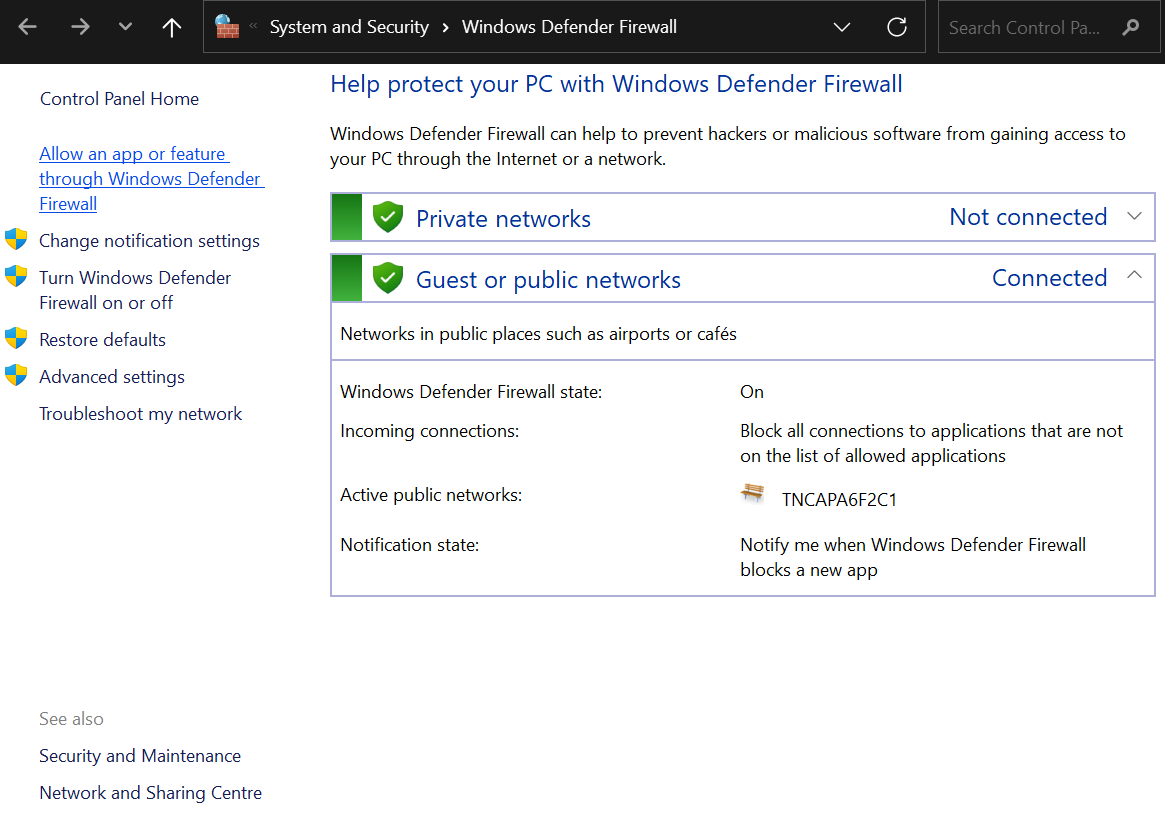
Select Allow an app or feature through Windows Defender Firewall, and scroll until you find ShooterGame (i.e., ARK).
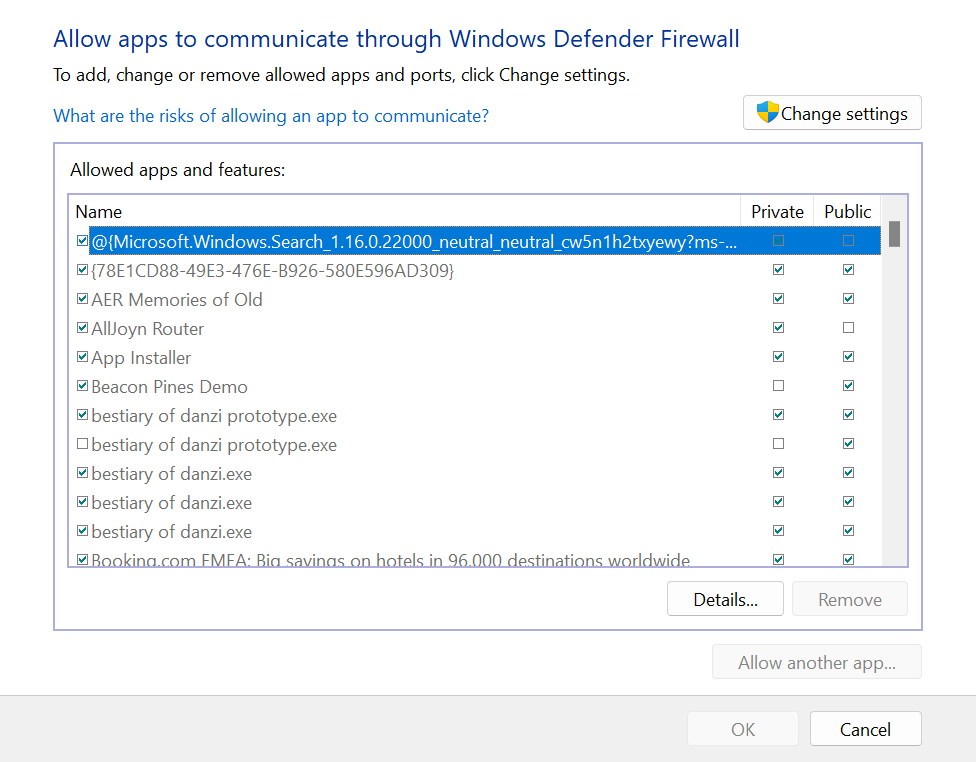
For all ShooterGame apps, check both the Private and Public boxes.
Forward Ports on Your Router
Log into your router, and navigate to the port forwarding option. If it’s not available in the settings, you may need to upgrade your router.
Step 5: Join the Server
Lastly, it’s time to join your ARK dedicated server. Now that you’ve got your server working, you have to connect to it with your device.
Local Host
Local hosting is often used when all players are connected to the same network and share the same IP address. For example, all players are in the same house when connecting to the server.
Follow these steps to join the server via a local host:
Launch the Steam client, and click View>Servers.
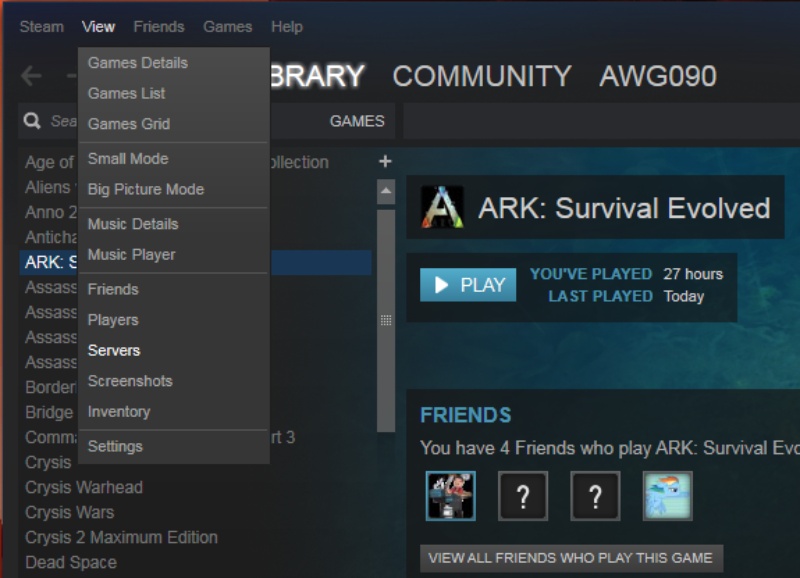
On the Servers window, select the Favorites tab.
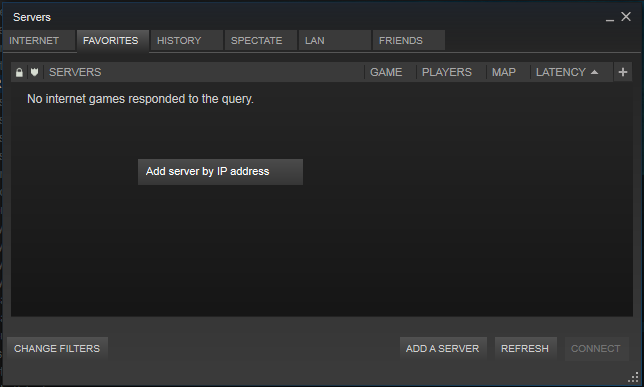
Click Add a Server and type out localhost:27015.

When you’re finished, click Add This Address to Favorites. Then, go back to the Favorites tab and refresh the page. Your server should now be listed.
Private IP
If you can’t connect via a local host, try a private IP:
When adding a server from the Favorites tab, click the Windows-key + R.
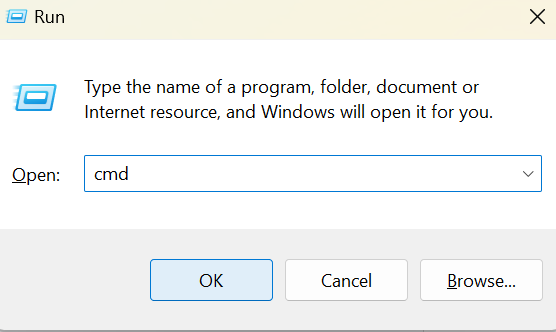
Type cmd in the run command window and click OK.
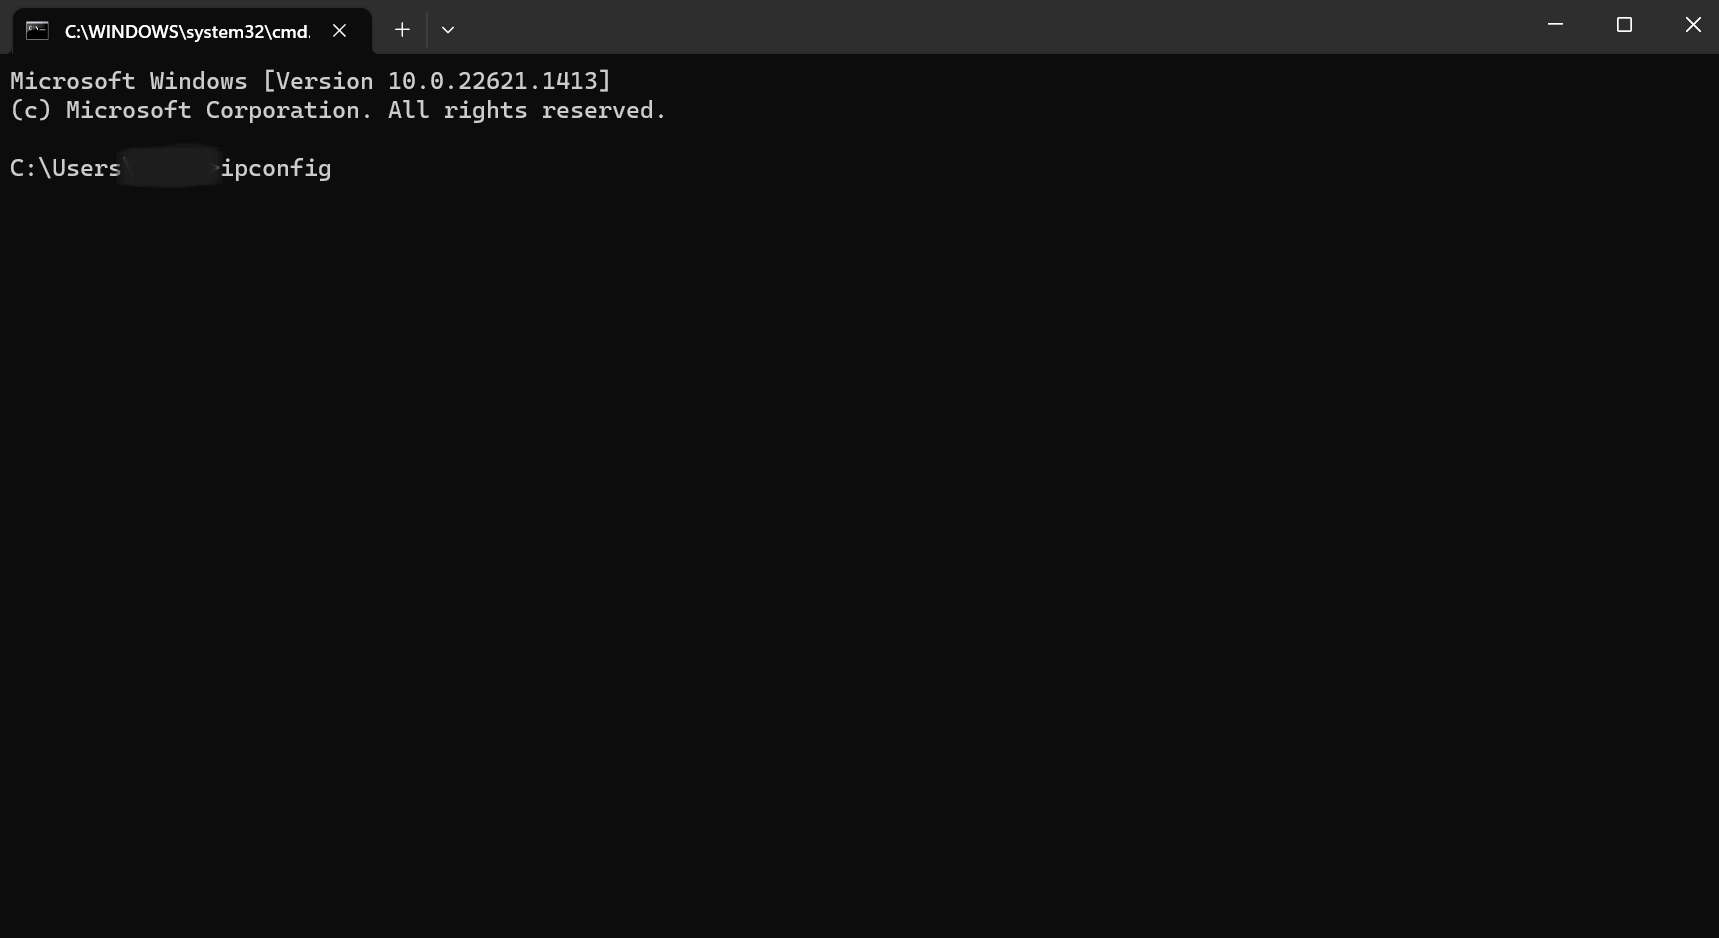
Type ipconfig in the new window that pops up and press Enter. You should now be able to see your local IP address.
Return to Steam and add the IP as a server address. Refresh the Favorites tab when you’re done — your server should now be available.
Public IP
If your server still doesn’t show up in the Favorites tab, try using a public IP.
Select Add a Server once more.
Use this public IP finder to find out your public IP address.
Input this address in the Add Server window and add it to your favorites.
Finally, click Refresh on the Favorites window. Your server should now appear on the list.
After successfully adding your server to your favorites, launch ARK. Select Join ARK, and connect to the server you just favorited.
Conclusion
ARK: Survival Evolved is a well-known survival multiplayer game. Like most MMOs, it functions best on its own dedicated server. The setup process for dedicated servers can differ depending on where you install your server from.
For example, SteamCMD installations can involve quite a few steps, while renting a server from Hostari takes almost no effort at all. Hostari servers come with an automated setup feature to make the process as easy as possible for ARK gamers.
Start our free trial today to get your server up and running in just 5 minutes.
Check out our blog on How to Use a Terraria Linux Server!